Crochet

A promising new year

This year is very promising. I launched my new facebook page, in lieu of a message sent by my friend, Ms. Meikah, who bought earrings from me last year.

Happy Customer! Happy Seller!

Happy Customer! Happy Seller!

A friend of hers saw my earrings and are interested to sell these items abroad. Yipee!!!! Just good enough reason for me to launch my facebook page, which I did plan last year. I just told myself, I have to finish the bags I am crocheting before launching it, but due to this news, I have to! So that I could share the excitement and thrill and yes, so that I can showcase some products. :)

Hence another good news, a friend of my husband from Saudi Arabia placed an advanced order for this white little blouse,

White Crocheted Blouse

White Crocheted Blouse

This is very good news as I have a reason to write down the pattern as well.

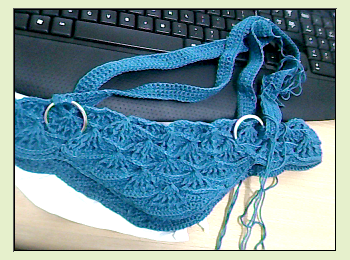
Another big deal is that I am crocheting a new bag design I created myself:

Bag Handle

Bag Handle

The bag handle is my favorite part of the bag. It’s textured and very tightly crocheted that it hurts. My nanay(mother-in-law) liked it too. She likes a lot of expensive bags and she said that it looks “tutyal” or very high-end. I really like being praised (for my works) because it makes me want to finish the items I am doing despite the pain and numbness of my fingers and joints.

I hope you are having a very good new year too!

Big and Fat and Silver Crocheted Earrings

Background: I decided I am going to sell so that I can earn the money I need to purchase new yarns. This way, I can buy what I want without harming our budget.

Big and Fat and Silver – retails at P200 per pair

They are crocheted using a 100% Metallic Polyester yarn from Ice Yarns. I used kidney earring wires so that it will have a lock, hence it will lessen the probability that you will lose the crocheted earring :)

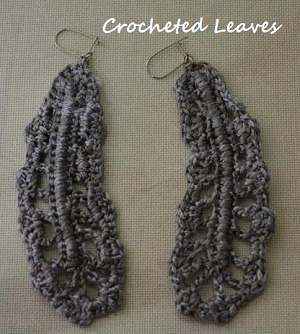
crocheted leaves

crocheted leaves – inspired from Irish Crochet’s Fern leaves

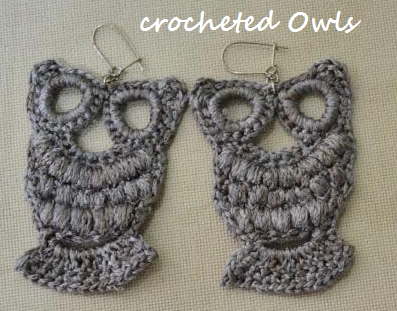
crocheted owl

crocheted owl – original design by Ginantsilyo.com

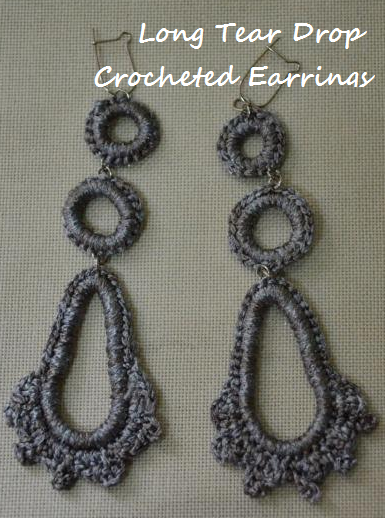
Long, Tear Drop Earrings

Long, Tear Drop Earrings – Original Design & Concept by Ginantsilyo.com

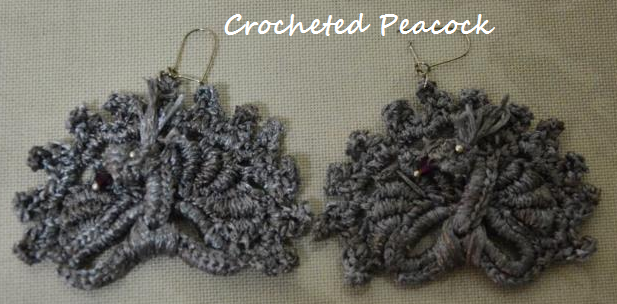
Crocheted Peacock

Crocheted Peacock – Original Design & Concept by Ginantsilyo.com

Crocheted Pouty Fish

Crocheted Pouty Fish – Original Design & Concept by Ginantsilyo.com

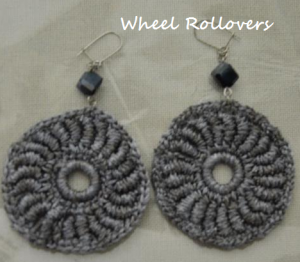
Crocheted Wheel Rollovers

Crocheted Wheel Rollovers – inspired from Irish Crocheted Flowers

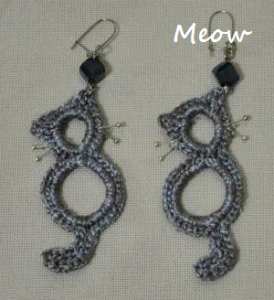
meow - crocheted cat

meow – crocheted cat – original design and concept by ginantsilyo.com

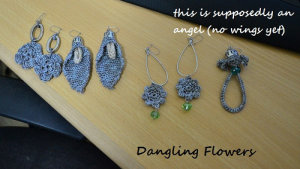
various flowers

various flowers – inspired by 100 Flowers to Knit & Crochet, angel is original design and concept

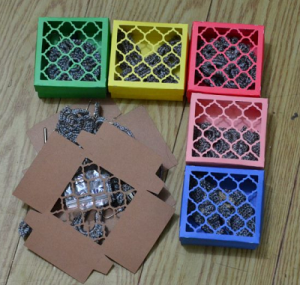
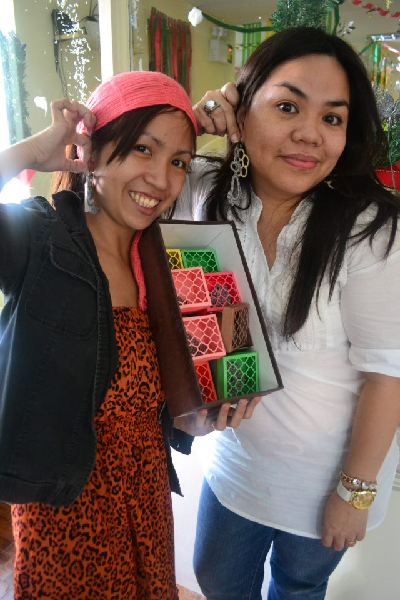
I am so happy with the earrings that I want them to be boxed on special boxes, so I have to take out my cricut machine to create fabulous boxes:

elegantly boxed up!

elegantly boxed up!

I am also happy to say that I was able to sell everything. It is also nice that the buyer appreciates my craft :) Thank you Ms. Meikah! And I hope your recipients would be very happy to receive handcrafted gifts from Ginantsilyo!

Happy Customer! Happy Seller!

Happy Customer! Happy Seller!

Crocheted Bag Hack From Miu-Miu

I want to crochet a bag and I have been eyeing this bag (randomly found on google):

Miu Miu Crochet Bag

Miu Miu Crochet Bag – image courtesy of http://eudelpng.org/miu-miu-crochet-bag.html

Then last night, I found out that today is a holiday. It means I am not required to work (Though I work even though I am not required) This led me into crocheting to my heart’s content.
Come morning, I promised Id render some work on the afternoon (tentatively, after lunch). It was my husband who bath my kiddo because I was still hooking up:

Front Design

Front Design

I am excited on how this will turn up so after lunch i still crocheted some more:

Back and FrontBack and Front

I am slave to my crochet hook. I cannot stop.

Back and Front

Close up Detail

I have some leather yarn (or cord) that I have been keeping for the longest time now, and finally I have some good use for it.

Almost done!

Almost done!

Look! It’s almost done now. the only reason why i stopped is because my hands are literally shaking. I just have to stop.z But I want to finish this. I will attach a plastic canvas into a cloth as lining to make a sturdy frame. I am planning to include this bag into a lot of stuffs I am planning to sell. I hope it will click. :)

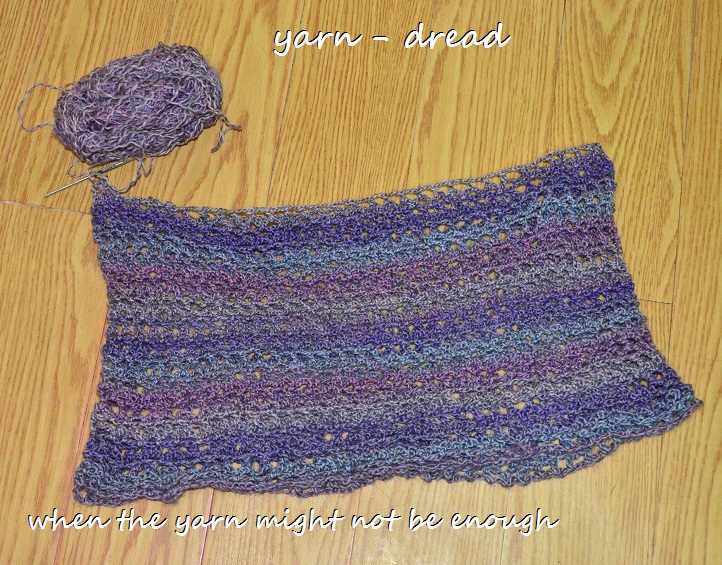
Yarn – dread

Yarn dread – when a yarn might not be enough.

Yarn Dread

Dreading the end of yarn

This is my problem with my current stash. Most of the yarns I want to crochet are only available in one full skein or two and I usually make wearable crochet. Whenever I pick up one big skein of yarn, I always wonder if it would be enough for a garment or not? Then sometimes, I just shrug it off and continue crocheting until I come to a point that I can no longer deny that the yarn will not be enough,

Improvisation is usually the solution to this. Sometimes what you do to improvise, actually works, sometimes it does not. As for me, since I usually crochet just to destress, thinking about what will work would defeat the purpose of crocheting at all. So I crochet and crochet. :)

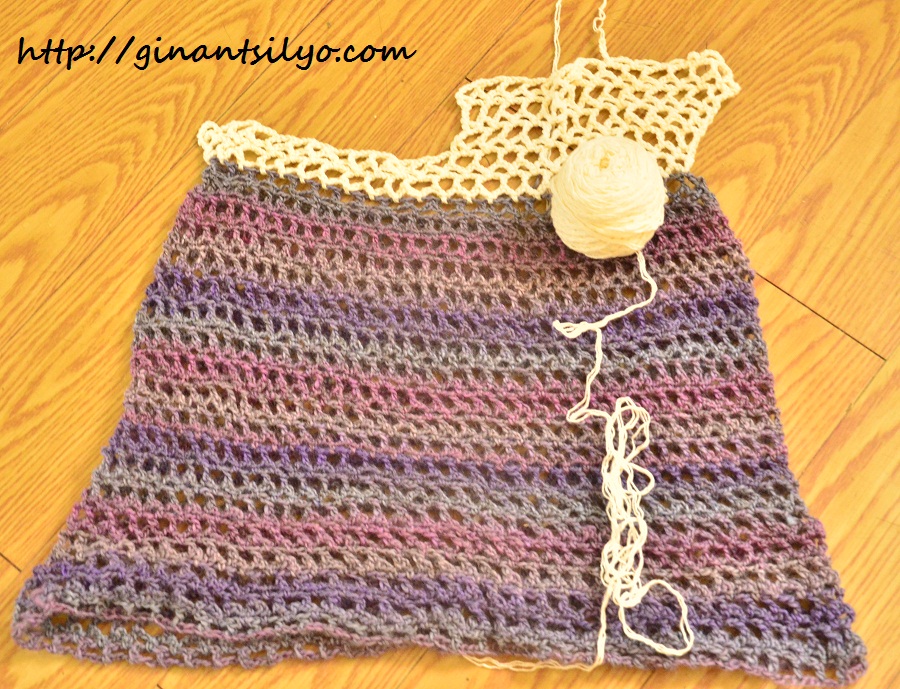
Current Status of Violet Blouse

Current Status of Violet Blouse

I attached a very soft cotton yarn on the top part of the blouse. The white yarn is very very soft and I almost have forgotten about this yarn I liked so long ago but only comes in two small skeins. Now I am thinking this might look good on this project. I am not yet so convinced but I will proceed with finishing this top. The violet monochromatic wool blend yarn complements with the soft texture of the white part, so I think I am heading the right direction.

On the other hand, I am thankful that I have 8 skeins of this yarn:

Ply Luxury Khaki Grey

Ply Luxury Khaki Grey from www.yarn-paradise.com

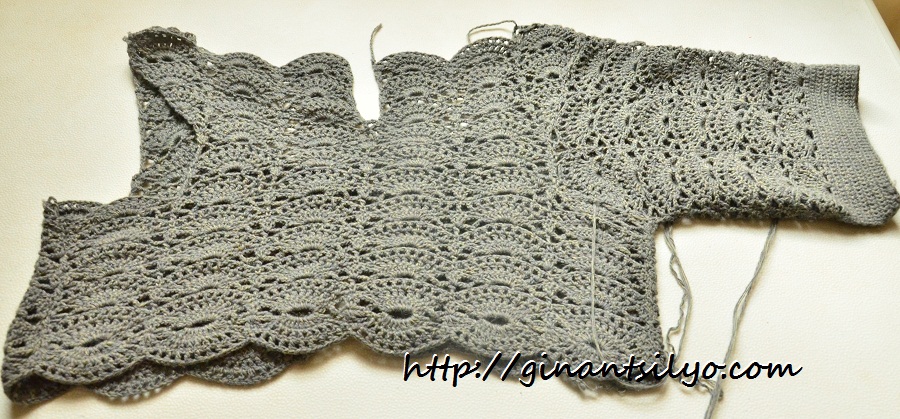
Specially if I am planning to make one full garment. The top part of the dress is done in one full skein while one  sleeve of this length  consumed half a skein. Hopefully I can still crochet amidst tons of coding I have yet to do. Aja!

Dress#2 progress

Dress#2 progress

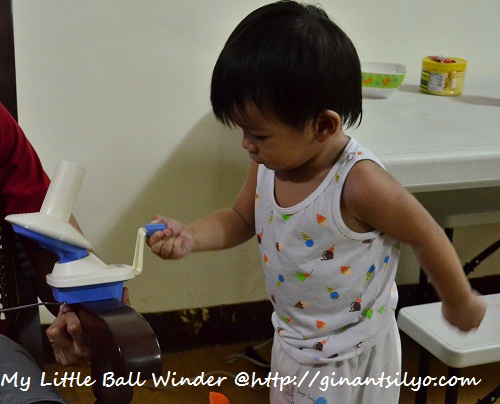
My Little Ball Winder


Ball Winder


I bought my ball winder online at http://craftandme.com. The little machine helps me have my used skeins of yarns well-kept and sorted by rewinding them in a good shape of ball. I also used it before when selling retails of yarns in small amount of weight to be used for frills or accessories, especially if one full 100g costs around 200 pesos or more, some of the people I know would not need mohair of that amount, so i wind them a fraction and sell it to them, or rewinding a yarn threaded in cones into balls since some crafters prefer center-pulled yarns.

Most of all, I love this winder because I can take two or three different yarns and wind them together. Then I can use this new skein for a new project. I usually do this because I normally buy lighter weight yarns and when making bags and shoes, bulkier yarns are better and more practical.

Cost of the Ball Winder: 2,500Php
Joy of my Kid when he learned how to operate it: Priceless

my little ball winder

my little ball winder with kiddo in full jest operating the machine.

Going Gaga over Hairpin Lace

A month ago, I never knew the name of the stitch I so love to make but do not know how. If you notice from my previous works that I have so many treble stitches in between horizontal lace mesh:

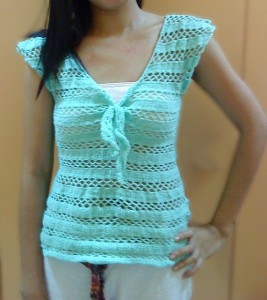
Mint Green Striped Front Tied Crocheted  Blouse

Mint Green Striped Front Tied Crocheted Blouse

This is me, attempting to actually do the so-called hairpin lace effect I’ve been eyeing over the years through windows of shops and magazines, until now.

Through a fellow crocheter, fats of http://crochetology.net, who introduced me to the term: hairpin lace, and lori of http://lorisart.blogspot.com/, who showed me that I could create a makeshift hairpin loom, my world literally turned upside down. I am gaga over hairpin lace now. I love incorporating it in anything I can create and everytime I see fences, or grills or anything that has two parallel bars, I imagine me crocheting lace in between.

So far, i have made a makeshift hairpin lace loom using rubber soles of old slippers and two double pointed bamboo knitting needles:

Makeshift Hairpin Lace Loom

Makeshift Hairpin Lace Loom

I was able to make this hairpin lace collar:

Hairpin lace collar

Hairpin lace collar

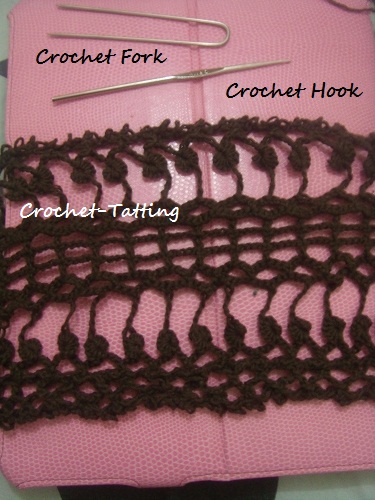
And then I bought this small crochet fork from a fellow raveler at http://handmadebybheng.blogspot.com which is very small I do not know if I can make further use of this:

Sunday lace work

Sunday lace work

And i started a dress that is also showcasing a hairpin lace collar :)

Dress showcasing a hairpin lace collar

Dress showcasing a hairpin lace collar

Now, (since I get bored so easily) I am starting another project with hairpin lace collar again 😀 hahaha.. I have yet to test my patience on a full hairpin lace garment because, working with the loom is really very crazy and tiring!  Aja! Aja!

Let’s work hard! Hook up!

Dainty little crocheted shorts

This project was for: My website :)

I have put down my blog for two years and I just recently put this up again. And I did try to make up by writing a post every now and then. And I am happy about the results. A few followers seemed to pick up and this prompted me to write down documentations of my crochet works. Though I still have to finish the article I wrote about the Nelia, crocheted blouse, I have finished one documentation about the crocheted shorts hack. Though I did not arrived at exactly the same output, I think, I did better :)

The project was made by: ME! I have spent sleepless nights for this.

The project:

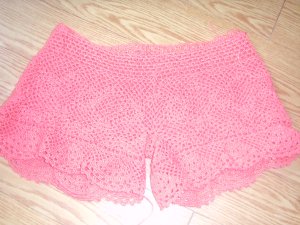
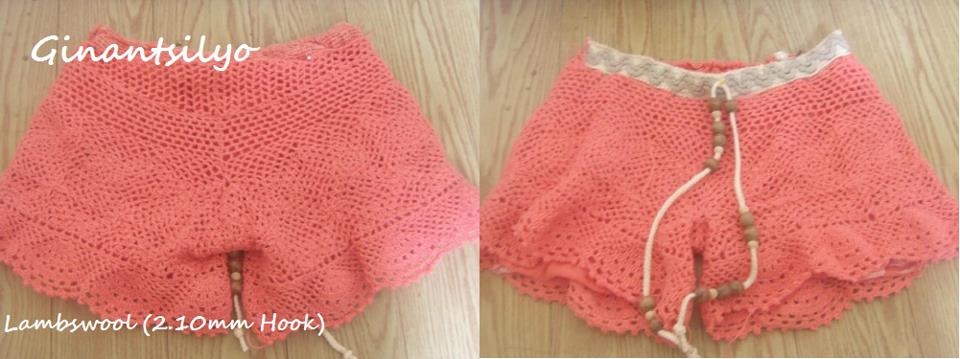
Taadaaaaaan!!! My very dainty little crocheted shorts:

Dainty little crocheted shorts

Dainty little crocheted shorts

To all those who picked up on my blogging (again)… Thank you guys. I do hope you understand my instructions because I am not a very good writer. If there are clarifications, you can post a comment below :)

I am very happy about the crocheted shorts and I am hooking on my next project. So see you guys again! :)

About the pattern:

You can follow my previous posts to recreate this shorts.


AngieHeart’s Shorts: Lace Edgings and Stitching Together

The final part of the series:

[Introduction, Basic Square, Connecting the Squares, Mesh & Half Motifs]

Now we are ready to crochet the last part of the shorts – The Lace Edging. The design uses a beautiful lace motif: a fan shaped lace with in between mesh.

You have to count your previous stitches here.The counting is as follows:
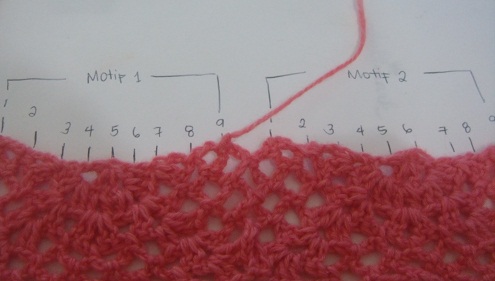
Foundation for the lace edging

Foundation for the lace edging

Each numbered stitch is where your dc 2ch will be stitched
Note that in my project, I have 7 half motifs stitched around.

Round 1: dc 2ch (or 3ch depending on the tightness of your stitches)make sure that the mesh around would not be too loose nor too tight.

Round 2: 3sc on each ch space, around (or 2sc depending on the tightness you want if round 1 is too loose, make it tighter by decreasing the number of sc in this row)

Round 3: 6ch (counts as 1 sc and 4 ch). (Note: sc on space between 3sc’s of previous row). Do sc 4ch around.

Round 4: Start on the middle of 4ch sp of previous row (slip st to the middle).  Do 2 ( sc 4ch ) You will reach the center of your half motif. * 5 dc into the next sp, sl st on next ch sp, counts as 1 sc.   Do 6 more sc-4ch repeats.* Repeat (*) around until you reach the two sc 4ch repeats you made on the start.

Round 5: Start on the middle of 4ch sp of previous row (slip st to the middle).   ( sc 4ch ) . * Do a dc – 2dc alternately on each five stitches of previous row.  sl st on next ch sp(count as one sc) 4ch .  Do 5 more  sc-4ch repeats. * Repeat (*) around until you reach the first sc-4ch you made on the start.

Round 6: sl st to the middle. **ch, *2dc on dc of previous row, ch skip one st* Repeat (*) four more times, sl st on next sp. (counts as 1 sc) 4 ch. Do 4 more sc-4ch repeats.*. Repeat (**) around until you reach the first st of your round. sl st on first ch.

Round 7: 3ch (counts as 1 dc) dc on each st (should have 14 dc) sl st on next sp. do the4  mesh until u reach the center again. dc on each st. repeat round

Round 8: ** 3ch (counts as 1dc) dc on same st. *2ch skip 2st. 2dc on next st* Repeat (*) 5 more times. 2ch sl st on next ch sp. Do 3 mesh. ** Repeat(**, note include additional 2ch at the start of **) around. then 2ch to close the round

Round 9. 3ch (counts as 1 dc) dc on next st . 2dc on ch space. repeat until you fill the center. (you should have 24 dc). sl st on next sp. *Do 2 mesh. 26 dc sl st on next ch sp* Repeat (*)around until you reach the last mesh of previous row. 2dc to close the round.

Round 10. sl st until you reach 3rd dc of previous round. 3ch (counts as 1dc) dc on next st. *2ch skip two stitches, dc on next two st.* Repeat (*) five more times. 2ch sc on next ch sp. ** Do 1 mesh.  ***2ch skip 2 st., dc on next two st***  Repeat (***) 6 more times, 2ch. ** Repeat (**) around. until you reach last mesh of previous row. ch 2 dc on next two st. ch 2. close the round.

Round 11. sl s until you reach the first ch of previous row. 3ch (counts as 1 dc) dc on ch space.* 2ch skip 2st, 2dc on next ch space.* Repeat (*) 5 more times sl st. ***(  **2ch sk 2st, 2dc on ch sp** Repeat ** 6 more   timess. sl st on next ch sp) *** Repeat *** around. :) then close the round and complete first motif by doing 2dc on ch sp, 2ch skip 2 st, 2dc on ch sp, 2ch.

Round 12 😀 FINALLY! LAST ROW! sl st on ch sp. Picot ( sc on ch sp 4ch sl st on sc, sc on ch space). sc on next two st, picot around 😀

YEI!!! DONE WITH THE LACE EDGING!

Lace edging

Lace edging

All you have to do next is to stitch the parts :) Be careful with stitching and do not ruin the lace design of the motif. To do this properly i pin the two parts in another pair of cropped pants I own:

See that there is still missing space for the shorts at the back.
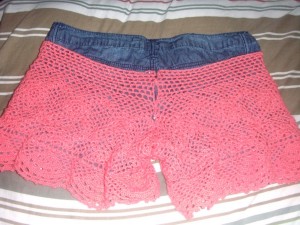
Back of shorts

Back of shorts

I have to fill this space by doing another mesh:

The lace mesh has 26 rows that is composed of dc 2ch (9 mesh in first row) up to 2 mesh on 26th row. The decreases depends on you :) I actually did not bother to count if the two lace mesh i made was exactly the same count :) Counting is sometimes stressful :)

Remember to make two of this!

Remember to make two of this!

Now, let’s sew the parts! :

Sew the back mesh we just made into each pair of back part of the short. The back part is the one with extra triangular half motif we made.

Then sew the back parts together!
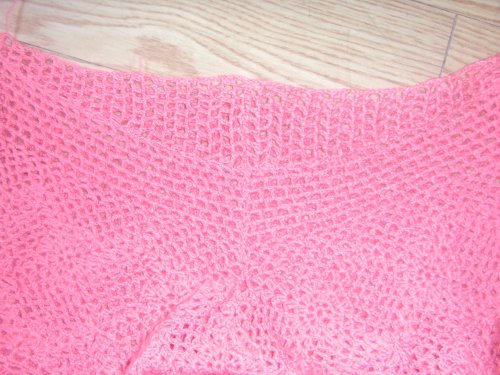
Back Part!

Back Part!

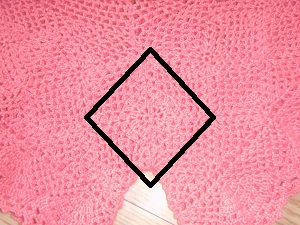
The half triangular motifs on each part will form a diamond shape when sewn :)

When you get this, it is your assurance that you are sewing the parts properly.

When you get this, it is your assurance that you are sewing the parts properly.

And sew around until you are done sewing the front :)

Front part

Front part

:)

You can choose to put a lining to your shorts and a space for garter :) I lined mine and sew drawstring for the waist. :)

Luckily for me I have an old top that i am no longer using so I am going to upcycle this by incorporating it to my crocheted shorts :)


Old clothes i want to use for my shorts

Old clothes i want to use for my shorts

Next! The finished shorts! 😀

If anyone succeeds on creating the whole thing from my hack please send me a link! :) I want to know if i have been helpful :)
AngieHeart’s Shorts: Lace Mesh and Half Motifs

I am following up on the instructions on making the AngieHeart’s Crocheted Lace Shorts. My last post was about crocheting motifs together.

The first layer of the motif is actually too short for me. So I added a layer of half-motifs.

The following is the instructions on making the half-motifs:

1. 4ch to form a ring. 4ch,  *dc ch * (repeat * twice),  Turn around

2. (Row 2) 3ch dc on first st, create open shell 1 on next ch space [Open Shell 1: 2dc ch 2dc], 2dc on next ch space, openshell1 on next ch space, 2dc on last st. Turn around

3. (Row 3) Do a half open shell 1 on first st, with 3ch as your first dc [Half Open Shell 1: 1dc ch 2dc], Open Shell 2 on next ch space [Open Shell 2: 2dc 2ch 2dc], Open shell 1 in between the 2dc of previous row, Open shell 2 on next ch space, Half open shell 1 on last st. Turn around

4. (Row 4) ch, sc on first st. 4ch sc, 3ch Open shell 2 on the corner, 3ch sc, 4ch sc, 4ch sc,  3ch, Open Shell 2 on the corner, 3ch sc, 4ch sc. Turn around

5. (Row 5) 5 ch sc, 4ch sc, 3 ch, Open shell 2 on the corner, 3ch sc, 4ch sc, 4ch sc, 4ch sc,  3ch, Open Shell 2 on the corner, 3ch sc, 4ch sc, 2ch dc on last st. Turn around.

Row 5: Angie Heart’s Crocheted Lace Shorts Half Motif (Before Stitching with the other motifs)

Row 5: Angie Heart’s Crocheted Lace Shorts Half Motif (Before Stitching with the other motifs)

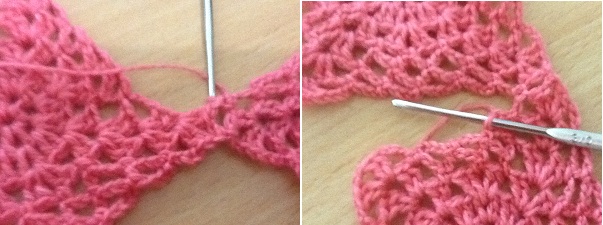
On Row 6 you have to begin stitching the half motif as you go. Always sc alternately into your half motif and onto the other motifs.

6. (Row 6) ch, sc on same st. 4ch sc, 4ch sc, 3ch, OpenShell2 on the corner, 3ch sc, 4ch sc (three times) 3ch Open shell2 on the corner, 3ch sc, 4ch sc, 4ch sc. Yarn off

Row 6: Angie Heart’s Crocheted Lace Shorts Half Motif (After Stitching with the other motifs)

Row 6: Angie Heart’s Crocheted Lace Shorts Half Motif (After Stitching with the other motifs)

Then the next would be crocheting the upper part to form the waist of the shorts.

The mesh is composed of two parts:

  1. 4ch sc repeats on four rows
  2. 1dc 2ch (or 3ch, if you want a bigger waistline) repeats on remaining rows (the number is indefinite, depending on how long you want the upper part to be, I did 7 rows of this mesh)
AngieHeart's Crocheted Lace Shorts: Other Half Showing Two Layers of Lace Mesh

AngieHeart’s Crocheted Lace Shorts: Other Half Showing Two Layers of Lace Mesh

The length of your mesh depends on you. I decided on a shorter mesh, but on my first shorts, the mesh is wider.

First Crocheted Shorts showing a wider lace mesh

First Crocheted Shorts showing a wider lace mesh

——————————–

Two parts for the legs

Two parts for the legs

After finishing the parts of the shorts I am ready to crochet the lacy part around the legs (cuffs) but there is a problem with the design which I have noticed on the shorts I were able to make in the past. I added a modification to the design. The actual crocheted shorts doesn’t have a lining underneath to support the gap between the legs (That is pundyo in tagalog).

Space between the legs

Space between the legs

So, I added another half square motif to fill the gap.

Filling the gap

Filling the gap

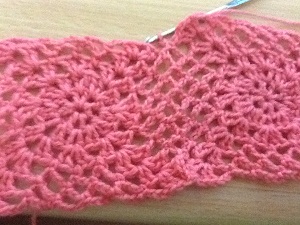
Then there is another gap for the buttocks, since the behind is always fuller than the front, there would be a gap if uniform stitches were made for the front and the back.
Gap on the back

Gap on the back

My solution to this is to crochet another half motif (a triangular one) to fill the gap.

Filling the Gap II

Filling the Gap II

You have to follow the instructions for the basic square motif but just make sure you only have to crochet three corners instead of four. Then remember to stitch into the other motifs when you are already working on the 6th row.

Next is making the lace:

AngieHeart's Shorts: Lace Edging

AngieHeart’s Shorts: Lace Edging

See you on my next post!

Angie Heart’s Shorts – crocheting motif squares together

Following up my previous post about crocheting the Angie Heart’s crochet lace shorts, here are the instructions on how you would crochet the square motifs together:

1. You have to follow the instructions up to 5th round.

AngieHeart's Crochet Shorts Basic Square Motif Up to Round 5

AngieHeart’s Crochet Shorts Basic Square Motif Up to Round 5

2. For the 6th round, crochet the first half of the open shell [ 3ch, dc 1ch, then sc into one of open shell’s of another square, sc into the ch space]

AngieHeart's Crochet Shorts Basic Square Motif - crocheting into another square 1

AngieHeart’s Crochet Shorts Basic Square Motif – crocheting into another square 1

Then continue doing the rest o f the open shell into the square.

AngieHeart's Crochet Shorts Basic Square Motif - crocheting into another square 2

AngieHeart’s Crochet Shorts Basic Square Motif – crocheting into another square 2

3. crochet 1 ch and sc into the next ch space of the other square then ch 1 and sc into the next ch space of your square

AngieHeart's Crochet Shorts Basic Square Motif - crocheting into another square 3

AngieHeart’s Crochet Shorts Basic Square Motif – crocheting into another square 3

4. Do the same thing on the next ch spaces. Do 2ch sc into the other square, 2ch and sc into the square for all ch sp with 4 ch. and 1 ch sc 1 ch to the ch sp with only 3ch.

Your two squares should be connected as if they were crocheted as one 😀

AngieHeart's Crochet Shorts Basic Square Motif - crocheting into another square 4

AngieHeart’s Crochet Shorts Basic Square Motif – crocheting into another square 4

5. Finish connecting two squares by connecting the corner open shells again: 2dc ch, sc on the other square, ch 2dc into square

Finish the rest of the 6th round:

AngieHeart's Crochet Shorts Basic Square Motif - crocheting into another square 5

AngieHeart’s Crochet Shorts Basic Square Motif – crocheting into another square 5


Connect 6 squares together. And make two connected rectangles :) so that’s 12 square motifs you have to make!

Next is crocheting the mesh :) on top of the motifs :D