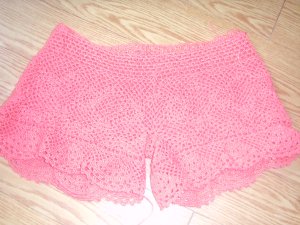
The final part of the series:
[Introduction, Basic Square, Connecting the Squares, Mesh & Half Motifs]
Now we are ready to crochet the last part of the shorts – The Lace Edging. The design uses a beautiful lace motif: a fan shaped lace with in between mesh.
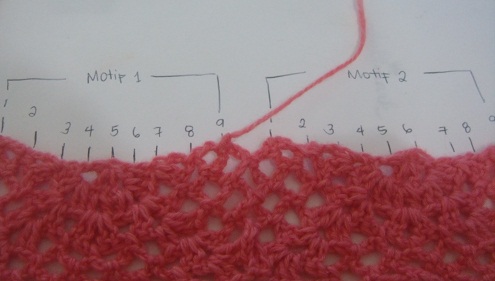
You have to count your previous stitches here.The counting is as follows:
Each numbered stitch is where your dc 2ch will be stitched
Note that in my project, I have 7 half motifs stitched around.
Round 1: dc 2ch (or 3ch depending on the tightness of your stitches)make sure that the mesh around would not be too loose nor too tight.
Round 2: 3sc on each ch space, around (or 2sc depending on the tightness you want if round 1 is too loose, make it tighter by decreasing the number of sc in this row)
Round 3: 6ch (counts as 1 sc and 4 ch). (Note: sc on space between 3sc’s of previous row). Do sc 4ch around.
Round 4: Start on the middle of 4ch sp of previous row (slip st to the middle). Do 2 ( sc 4ch ) You will reach the center of your half motif. * 5 dc into the next sp, sl st on next ch sp, counts as 1 sc. Do 6 more sc-4ch repeats.* Repeat (*) around until you reach the two sc 4ch repeats you made on the start.
Round 5: Start on the middle of 4ch sp of previous row (slip st to the middle). ( sc 4ch ) . * Do a dc – 2dc alternately on each five stitches of previous row. sl st on next ch sp(count as one sc) 4ch . Do 5 more sc-4ch repeats. * Repeat (*) around until you reach the first sc-4ch you made on the start.
Round 6: sl st to the middle. **ch, *2dc on dc of previous row, ch skip one st* Repeat (*) four more times, sl st on next sp. (counts as 1 sc) 4 ch. Do 4 more sc-4ch repeats.*. Repeat (**) around until you reach the first st of your round. sl st on first ch.
Round 7: 3ch (counts as 1 dc) dc on each st (should have 14 dc) sl st on next sp. do the4 mesh until u reach the center again. dc on each st. repeat round
Round 8: ** 3ch (counts as 1dc) dc on same st. *2ch skip 2st. 2dc on next st* Repeat (*) 5 more times. 2ch sl st on next ch sp. Do 3 mesh. ** Repeat(**, note include additional 2ch at the start of **) around. then 2ch to close the round
Round 9. 3ch (counts as 1 dc) dc on next st . 2dc on ch space. repeat until you fill the center. (you should have 24 dc). sl st on next sp. *Do 2 mesh. 26 dc sl st on next ch sp* Repeat (*)around until you reach the last mesh of previous row. 2dc to close the round.
Round 10. sl st until you reach 3rd dc of previous round. 3ch (counts as 1dc) dc on next st. *2ch skip two stitches, dc on next two st.* Repeat (*) five more times. 2ch sc on next ch sp. ** Do 1 mesh. ***2ch skip 2 st., dc on next two st*** Repeat (***) 6 more times, 2ch. ** Repeat (**) around. until you reach last mesh of previous row. ch 2 dc on next two st. ch 2. close the round.
Round 11. sl s until you reach the first ch of previous row. 3ch (counts as 1 dc) dc on ch space.* 2ch skip 2st, 2dc on next ch space.* Repeat (*) 5 more times sl st. ***( **2ch sk 2st, 2dc on ch sp** Repeat ** 6 more timess. sl st on next ch sp) *** Repeat *** around.  then close the round and complete first motif by doing 2dc on ch sp, 2ch skip 2 st, 2dc on ch sp, 2ch.
Round 12 😀 FINALLY! LAST ROW! sl st on ch sp. Picot ( sc on ch sp 4ch sl st on sc, sc on ch space). sc on next two st, picot around 😀
YEI!!! DONE WITH THE LACE EDGING!
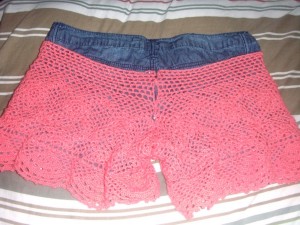
All you have to do next is to stitch the parts  Be careful with stitching and do not ruin the lace design of the motif. To do this properly i pin the two parts in another pair of cropped pants I own:
See that there is still missing space for the shorts at the back.
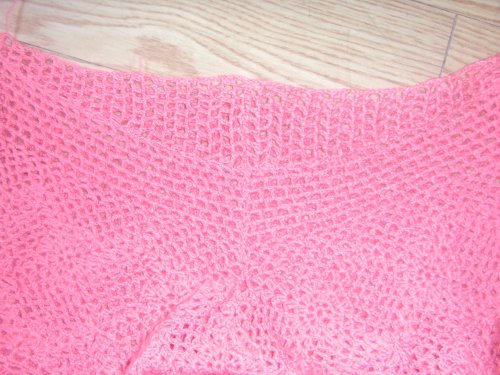
I have to fill this space by doing another mesh:
The lace mesh has 26 rows that is composed of dc 2ch (9 mesh in first row) up to 2 mesh on 26th row. The decreases depends on you  I actually did not bother to count if the two lace mesh i made was exactly the same count
  Counting is sometimes stressful
Now, let’s sew the parts! :
Sew the back mesh we just made into each pair of back part of the short. The back part is the one with extra triangular half motif we made.
Then sew the back parts together!
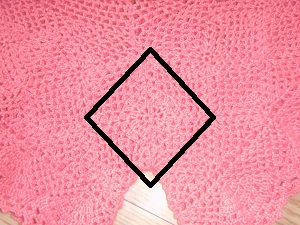
The half triangular motifs on each part will form a diamond shape when sewn 
And sew around until you are done sewing the front 

You can choose to put a lining to your shorts and a space for garter  I lined mine and sew drawstring for the waist.
Luckily for me I have an old top that i am no longer using so I am going to upcycle this by incorporating it to my crocheted shorts 

Old clothes i want to use for my shorts
Next! The finished shorts! 😀
If anyone succeeds on creating the whole thing from my hack please send me a link!  I want to know if i have been helpful

