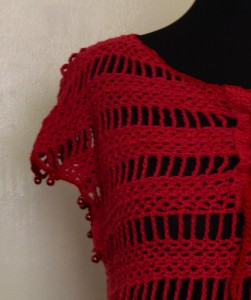
Finally, I was able to finish the pattern for the upper front part of the blouse.
[Learn Ginantsilyo by project]
What the project is about: crocheting the front part of the Nelia – crocheted blouse by using the lace pattern discussed here and use increasing and decreasing stitches to form a shape
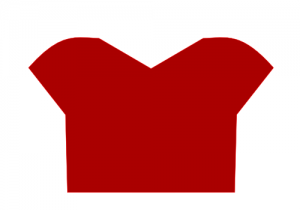
One of the skills I learned as a crocheter is to create shapes by decreasing and increasing stitches. A simple mesh can take form by carefully adjusting the number of stitches per row. Following this notion, I decided on crocheting a top with a wide arm hole – forming the ‘sleeves’ as shownon the left. The sleeves here would be part of the main crocheted garment and would not be crocheted separately.
The UPPER – FRONT PART OF THE GARMENT:
The first part that I made was the upper front part of the blouse. You could see that there are increasing stitches on the left side of the cloth to form the sleeves and decreasing stitches on the right side of the cloth to form the neckline. The front parts are crocheted separately since we would join them using a ‘tie’ or a ribbon made from crocheted chain.
Crochet Instructions and Pattern:
We start by crocheting the foundation chain.
Foundation Chain : 55ch [start the next row by crocheting 1ch]
Rows 1-3: Start the Mesh described here.
Row 4: 2sc -ch repeats on the entire row
Rows 5-7: Same as Rows 1-3
Rows 1-7 will form the first part of the lace ‘stripes’.
Row 8: Make a wide stripe by doing a triple treble – 2ch repeats on the entire row. This open lace work will form the second stripe of the lace.
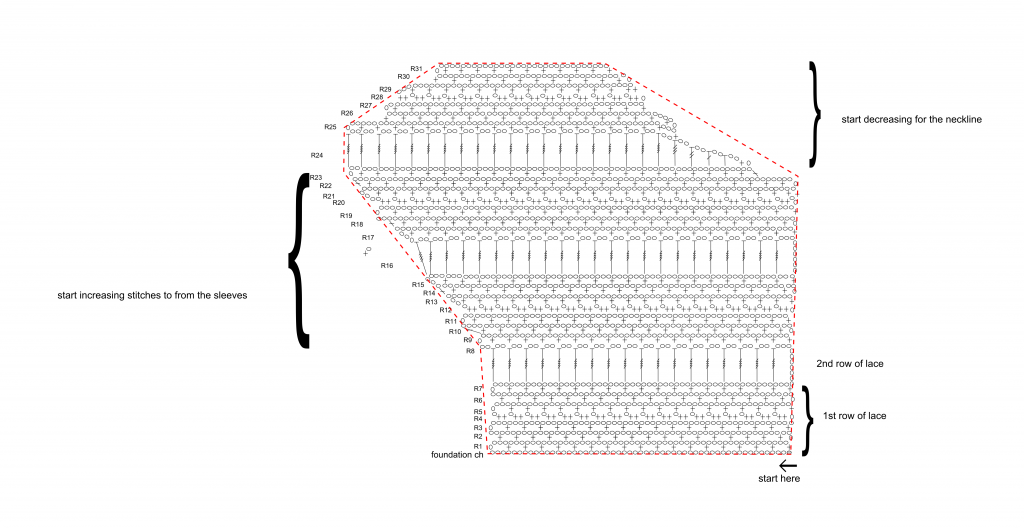
Do rows 9-15 in increasing stitches. Increase should be made by adding another sc – 3ch (same st) every time you reach the armhole part.
Row 16: same as Row 8 but add another tr tr – 2ch on the armhole part to increase stitch
Rows 17-23 will be same as rows 9-15 but start decreasing on the neckline on the 23rd row by turning to 24th row leaving two spaces [space == sc – 3ch] on the 22nd row.
Row 24 – Form the neckline by slowly increasing the stitch height and still following the pattern st – 2ch. The increasing of the stitch height would be (disregarding the 2ch)
[sc – hdc – dc – tr – d tr – t tr on the rest of the row]
Rows 25 – 31 would have decreasing on both sides (arm hole and neckline) The 31st row should have a total of 43 stitches or 10 spaces (sc – 3ch)
Crochet Pattern:
[You can download the pattern by clicking on the image]
The instructions and the pattern should guide you in making the upper front part of the blouse. Remember to make two of these but do not cut the yarn off until the next instructions for the back part. The back part and the front part will be crocheted as one, but the way the stitches were decreased for the back part is a bit more complicated.


