free crochet patterns and instructions

Three Way Crocheted Bandeau – Free Pattern

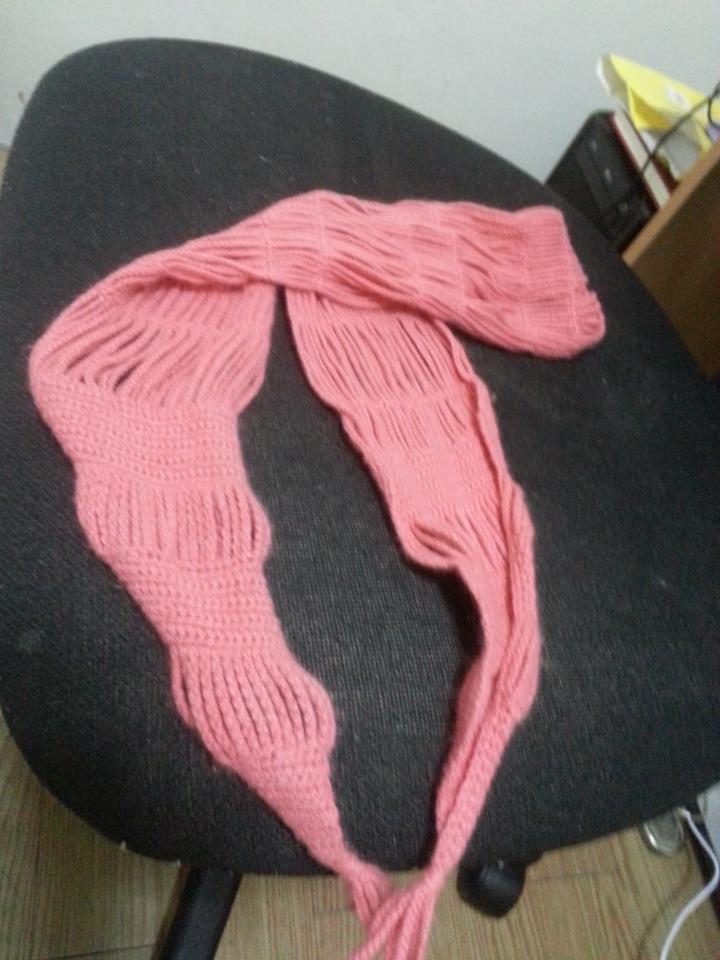
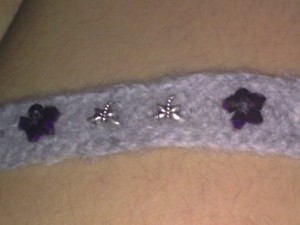
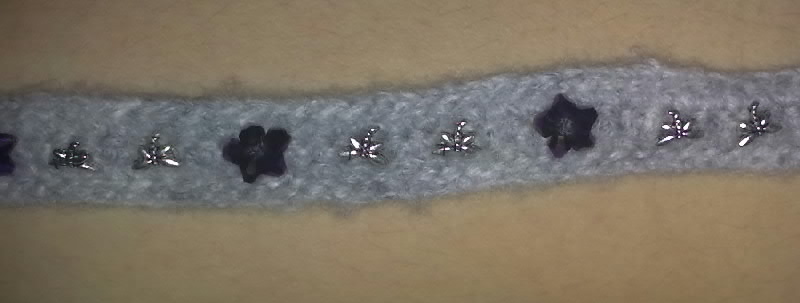
As promised, I have finally written the pattern for my Three-way crocheted bandeau (Though it’s three way, I mostly use this as headband :D)

You can use this as (1) neck scarf (2) Headband (3) belt

Notes on the yarn used:

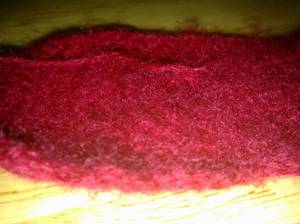
I used a woolen yarn (90% lambswool) that felts (I did not felt it but it felts overtime when you laundry it) So the resulting texture is very soft.

I am destashing some yarns here:

https://www.facebook.com/media/set/?set=a.217809011697560.63447.187368954741566&type=3

You can use any kind of yarn you want :) But the texture and output would really be different.

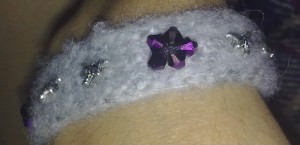
Chillin' with my sister and friend on a hot afternoon

Chillin’ with my sister and friend on a hot afternoon

You can download the pdf pattern here:

Just in case the crochet chart is not clear, download original here:

Three way crocheted bandeau - crochet chart for sides

Three way crocheted bandeau – crochet chart for sides

Please send a comment here for feedback. If you manage to finish a project, do share it on my facebook wall: http://facebook.com/ginantsilyo.

Three Way Crocheted Bandeau

Three Way Crocheted Bandeau

Happy crocheting!

Calla Lily – Crocheted Earrings

I love the book 100 Flowers to knit and crochet by Lesley Stanfield. My only problem with this is almost all the lovely flowers I would love to crochet is given as “knit instructions”.

100 Flowers to knit and crochet by Lesley Stanfield

100 Flowers to knit and crochet by Lesley Stanfield

But fortunately, I have taken the instructions given in the book as guide to hacking my crochet instructions of the calla lily. If you are a knitter, proceed to following the instructions given in this page. If you are a crocheter like me, I have a decent hack of the said pattern:

100 Flowers to knit and crochet - arum lily

100 Flowers to knit and crochet – arum lily

Note that  I do not claim to have an exact translation of the knit-crochet pattern. Also I am not very good in writing instructions.

This is my crochet version of the motif:

The trick is use embroidery threads instead of yarn, 0.70mm hook and White Glue to make the earrings stiff after crocheting

Tools for creating tiny earrings

Tools for creating tiny earrings

You will need three colors of thread: Yarn A (white), Yarn B (green), Yarn C (yellow)

Use Yarn C:

The spathe is crocheted using 6 strands of thread.

ch 10. Fold in two. (set aside)

Special stitches:

2sc cluster: 2sc in 1 st, equivalent to 2sc count

2sctog: 1 sc in 2 st, equivalent to 1 sc count

(n)sc: where (n) is number, 1sc on 1st (n) times;

The lily:

Use two strands of  Yarn A:

Foundation ch 6, (crochet in rounds, with sl st to close each round)

round 1: 9 sc around

round 2: sc, 2sc cluster (around) make 15 sc

round 3 – 6: 15 sc around

Fill the cavity with excess thread

round 7: sc, 2sctog around (makes 9 sc)

crochet in rows, start each row with ch

row 8-9: 9sc

row 10: sc, 2sc cluster for the remaining 8 st, (17 sc)

row 11: sc, 2sc cluster for the remaining 16 st (33 sc)

row 12-13: 33sc

row 14 – 17: *2sc, 2sctog*  (repeat * til end of row)( make 25sc,  19 sc, 14sc, 11sc)

row 18-23: *2sctog, 2sc* (repeat * til end of row) (make 8sc, 6sc, 4sc, 3sc)

row 24: 2sctog, sc (2 sc)

row 25: 2sctog (1sc)

row 25: sc (1sc)

cut off yarn

——

Use two strands of Yarn B.

attach yarn to the tip of the lily (foundation ch)

9sc (three rows)


Insert the spathe inside the lily.

Cover the earrings with white glue then let it dry.

Attach pearl/bead to the end of the lily using jewelry wire :)

—-

Final Product:

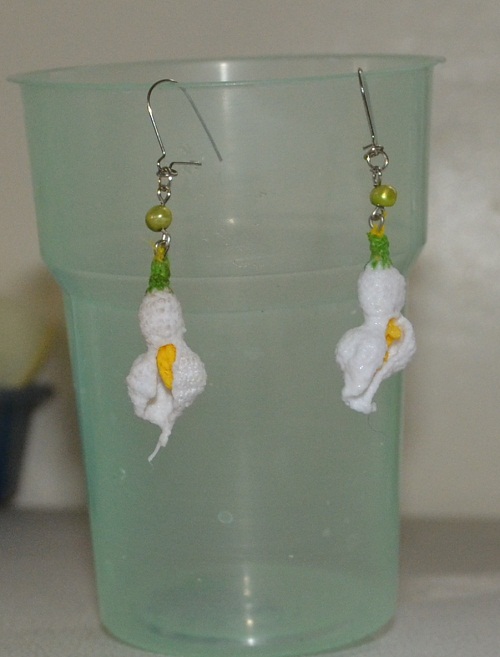
Dangling Crocheted Earrings - motif: Arum Lily

Dangling Crocheted Earrings – motif: Arum Lily
from 100 flowers to knit and crochet by Lesley Stanfield

Second attempt:

Calla Lily White

Calla Lily White


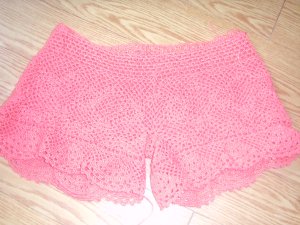
AngieHeart’s Shorts: Lace Edgings and Stitching Together

The final part of the series:

[Introduction, Basic Square, Connecting the Squares, Mesh & Half Motifs]

Now we are ready to crochet the last part of the shorts – The Lace Edging. The design uses a beautiful lace motif: a fan shaped lace with in between mesh.

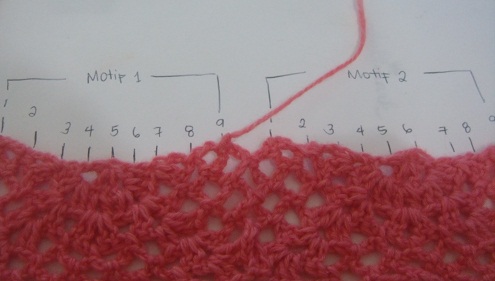
You have to count your previous stitches here.The counting is as follows:

Foundation for the lace edging

Foundation for the lace edging

Each numbered stitch is where your dc 2ch will be stitched
Note that in my project, I have 7 half motifs stitched around.

Round 1: dc 2ch (or 3ch depending on the tightness of your stitches)make sure that the mesh around would not be too loose nor too tight.

Round 2: 3sc on each ch space, around (or 2sc depending on the tightness you want if round 1 is too loose, make it tighter by decreasing the number of sc in this row)

Round 3: 6ch (counts as 1 sc and 4 ch). (Note: sc on space between 3sc’s of previous row). Do sc 4ch around.

Round 4: Start on the middle of 4ch sp of previous row (slip st to the middle).  Do 2 ( sc 4ch ) You will reach the center of your half motif. * 5 dc into the next sp, sl st on next ch sp, counts as 1 sc.   Do 6 more sc-4ch repeats.* Repeat (*) around until you reach the two sc 4ch repeats you made on the start.

Round 5: Start on the middle of 4ch sp of previous row (slip st to the middle).   ( sc 4ch ) . * Do a dc – 2dc alternately on each five stitches of previous row.  sl st on next ch sp(count as one sc) 4ch .  Do 5 more  sc-4ch repeats. * Repeat (*) around until you reach the first sc-4ch you made on the start.

Round 6: sl st to the middle. **ch, *2dc on dc of previous row, ch skip one st* Repeat (*) four more times, sl st on next sp. (counts as 1 sc) 4 ch. Do 4 more sc-4ch repeats.*. Repeat (**) around until you reach the first st of your round. sl st on first ch.

Round 7: 3ch (counts as 1 dc) dc on each st (should have 14 dc) sl st on next sp. do the4  mesh until u reach the center again. dc on each st. repeat round

Round 8: ** 3ch (counts as 1dc) dc on same st. *2ch skip 2st. 2dc on next st* Repeat (*) 5 more times. 2ch sl st on next ch sp. Do 3 mesh. ** Repeat(**, note include additional 2ch at the start of **) around. then 2ch to close the round

Round 9. 3ch (counts as 1 dc) dc on next st . 2dc on ch space. repeat until you fill the center. (you should have 24 dc). sl st on next sp. *Do 2 mesh. 26 dc sl st on next ch sp* Repeat (*)around until you reach the last mesh of previous row. 2dc to close the round.

Round 10. sl st until you reach 3rd dc of previous round. 3ch (counts as 1dc) dc on next st. *2ch skip two stitches, dc on next two st.* Repeat (*) five more times. 2ch sc on next ch sp. ** Do 1 mesh.  ***2ch skip 2 st., dc on next two st***  Repeat (***) 6 more times, 2ch. ** Repeat (**) around. until you reach last mesh of previous row. ch 2 dc on next two st. ch 2. close the round.

Round 11. sl s until you reach the first ch of previous row. 3ch (counts as 1 dc) dc on ch space.* 2ch skip 2st, 2dc on next ch space.* Repeat (*) 5 more times sl st. ***(  **2ch sk 2st, 2dc on ch sp** Repeat ** 6 more   timess. sl st on next ch sp) *** Repeat *** around. :) then close the round and complete first motif by doing 2dc on ch sp, 2ch skip 2 st, 2dc on ch sp, 2ch.

Round 12 😀 FINALLY! LAST ROW! sl st on ch sp. Picot ( sc on ch sp 4ch sl st on sc, sc on ch space). sc on next two st, picot around 😀

YEI!!! DONE WITH THE LACE EDGING!

Lace edging

Lace edging

All you have to do next is to stitch the parts :) Be careful with stitching and do not ruin the lace design of the motif. To do this properly i pin the two parts in another pair of cropped pants I own:

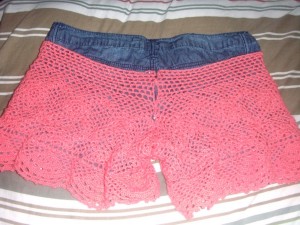
See that there is still missing space for the shorts at the back.

Back of shorts

Back of shorts

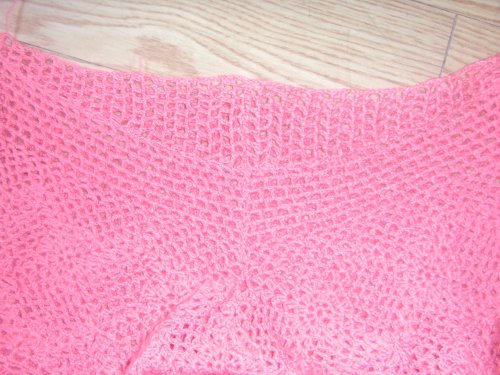
I have to fill this space by doing another mesh:

The lace mesh has 26 rows that is composed of dc 2ch (9 mesh in first row) up to 2 mesh on 26th row. The decreases depends on you :) I actually did not bother to count if the two lace mesh i made was exactly the same count :) Counting is sometimes stressful :)

Remember to make two of this!

Remember to make two of this!

Now, let’s sew the parts! :

Sew the back mesh we just made into each pair of back part of the short. The back part is the one with extra triangular half motif we made.

Then sew the back parts together!

Back Part!

Back Part!

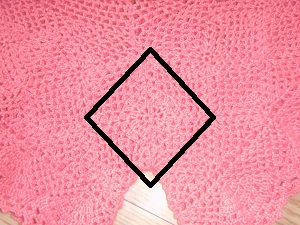
The half triangular motifs on each part will form a diamond shape when sewn :)

When you get this, it is your assurance that you are sewing the parts properly.

When you get this, it is your assurance that you are sewing the parts properly.

And sew around until you are done sewing the front :)

Front part

Front part

:)

You can choose to put a lining to your shorts and a space for garter :) I lined mine and sew drawstring for the waist. :)

Luckily for me I have an old top that i am no longer using so I am going to upcycle this by incorporating it to my crocheted shorts :)


Old clothes i want to use for my shorts

Old clothes i want to use for my shorts

Next! The finished shorts! 😀

If anyone succeeds on creating the whole thing from my hack please send me a link! :) I want to know if i have been helpful :)

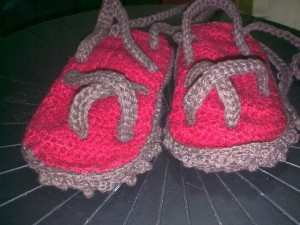
Free Pattern: Felted Baby Slippers with Textured Sole

[Learn Ginantsilyo by Project]


What the project is about: This is my attempt to felt the lambwool yarns I bought from China.


One of the skills I am attempting to learn as a crocheter is to felt wool. In this project, I tried to create slippers with felted sole for added comfort to the wearer.

I was playing with my fiance’s niece when I saw one of her slippers lying around. I picked it up and got inspired to make a pair of slippers. It’s what I do usually. Be inspired then crochet.

This pair of slippers is made with felted wool, for additional touch of softness and comfort. Plus ankle-wrap straps to secure the slippers on for extra flirty style. I also made the bottom sole textured for rough – look.

The project – Felted Baby Slippers with Textured Sole:

Felted Baby Slippers with Textured Sole

Felted Baby Slippers with Textured Sole


 About the yarns and the hook:

Brown Yarn – this was bought in Indonesia at http://craftandme.com under their Soft Cotton Category. 

Red Yarn – this was bought in China at http://tradekey.com. I negotiated with one of the suppliers there and got a huge lot of lambswool from them.

Needle

Hook Size

Size 2.1mm

Gauge/Tension

6ch ~ 1in

Finished Size

5.5 in x 2.5in


Abbreviations

ch = chain

sc = Single Crochet

hdc = Half Double Crochet

tc = Treble Crochet

sl st = Slip Stitch

sk = Skip

st = stitch

Pattern Notes

The textured effect was created by alternating treble and single crochet.

Each round starts with 1 ch.

Method

(Middle Sole and Top Sole) using Yarn A and Yarn B:

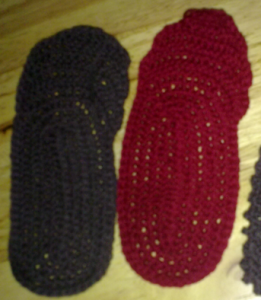
sole A and Sole B

sole A and Sole B

Foundation Chain: Chain 20

1st row: hdc on 2nd ch from hook. 17 hdc. (sk 1st ch) 3 hdc on 2nd ch, 17 hdc on back st of ch, 2hdc on last 2nd ch. Sl st.

2nd row: ch 1. 18hdc, (2hdc on next st) twice, 18 hdc, (2hdc on next st) twice. Sl st.

3rd row: ch 1. 2hdc on 1st

st. 16 hdc, (2 hdc on next st) twice. 2 hdc, (2 hdc on next st) twice. 16 hdc, (2 hdc on next st) twice. 2 hdc, 2hdc on next st. slip st.

4th row: ch 1, 20 hdc. (2hdc on next st) twice. 2 hdc,  . (2hdc on next st) twice. 20 hdc, . (2hdc on next st) twice. 2 hdc,  . (2hdc on next st) twice. Sl st.

5th row: ch 1, 20 hdc. (2hdc on next st) twice. 6 hdc,  . (2hdc on next st) twice. 20 hdc, . (2hdc on next st) twice. 6 hdc,  . (2hdc on next st) twice. Sl st. Turn

6th row: 5 hdc, 2hdc on next st, 2 hdc, 2hdc on next st, 1 hdc, 2 hdc on next st, 7 hdc. Turn

7th row: ch 1, sk 1st st, 18 hdc, sl st. Turn

8th row: ch 1, sk 1st st. 5 hdc. 2 hdc on next st, 5 hdc, 2 hdc on next st. 3 hdc, sl st. Turn

9th row: ch 1, sk 1st st, 4 hdc, 2 hdc on next st, 7 hdc, 2 hdc on next st, 2 hdc. Turn.

10th row: ch 1, sk 1st st, 11 hdc, 2 hdc on next st, 2 hdc. Turn

11th row: ch 1, sk 1st 2 st, 10 hdc. Turn

12th row: ch 1, sk 1st 2 st, 3 hdc, sk 1 st, 3 hdc. Turn

13th row: ch 1, sk 1st 2 st, 3 hdc. Sl st.

Finishing: To smoothen edges of the, sl st  with additional sc every now and then:

Textured Sole:

Use Yarn A:

textured sole

The following stitches are done with alternating treble and single crochet. Every round starts with 1 ch.

Note that st represents alternating single and treble crochet

Foundation Chain: Chain 20

1st row: 1 st on 2nd ch from hook. 17 st (sk 1st ch) 3 st on 2nd ch, 17 st on back st of ch, 2 st on last 2nd ch. Sl st.

2nd row: ch 1. 18 st, (2 st on next st) twice, 18 st, (2st on next st) twice. Sl st.

3rd row: ch 1. 2 st on 1st st. 16 st, (2 st on next st) twice. 2 st, (2 st on next st) twice. 16 st, (2 st on next st) twice. 2 st, 2 st on next st. slip st.

4th row: ch 1, 20 st. (2 st on next st) twice. 2 st,  . (2 st on next st) twice. 20 st, . (2 st on next st) twice. 2 st,  . (2 st on next st) twice. Sl st.

5th row: ch 1, 20 st. (2 st on next st) twice. 6 st,  . (2 st on next st) twice. 20 st, . (2 st on next st) twice. 6 st,  . (2 st on next st) twice. Sl st. Turn

6th row:  ch 1, 22 st (2 st on next st) thrice 4 st (2 st on next st), 22 st (2 st on next st) thrice 4 st (2 st on next st). Sl st. (Fasten Off)

(Right Foot)

7th row: ch 1, Sk 7 st, 23 st, Turn

(Left Foot)

7th row: ch 1, 23 st, Turn

8th row: ch 1, 6 st, (2 st on next st) twice. 4 st, 2 st on next st, 4 st. Turn

9th row: ch 1, 18 st, sl st.

10th row: ch 1, sk 1st st, 15 st

11th row: ch 1, sk st, 10 st. Fasten Off

Straps:

Strap 1 (Use two strands of Yarn A):  ch 15, turn, 14 sc, turn, 13 sl st. Fasten Off.

Strap 2 (Use two strands of Yarn A):  ch 23, turn, 22 sc, turn, 21 sl st. Fasten Off.

Strap 3 (Use two strands of Yarn A):  ch 33, turn, 32 sc, turn, 31 sl st. Fasten Off.

Strap 4&5 (Use four strands of Yarn A):  ch 165. Fold the string into two. Cut in Half. Fasten off both ends

Felting:

Sole B After Felting

If you used faux-animal hair, skip this step.

Soak Top Sole (if Yarn B is untreated wool) in hot water (preferably water that just got boiled) with dishwashing liquid for 5-10 minutes (as desired – or longer). Remove the cloth from hot water. Be careful with being burned. Gently hand wash the cloth until felting occurs. Soak again to hot water. Repeat procedure til desired texture is achieve. Wash the soap in cold water. Let the sole dry.

< ![endif]–>

Assembly:

Assembling Parts Together

< ![endif]–>

< ![endif]–>

Fit Top Sole and middle sole on top of each other. Position the straps as shown on the left.

Secure the straps by sewing it (into top sole to middle sole) firmly and tightly. Make sure no straps are loose.

Sew the straps 4 and 5 near the back of the sole.

Using Yarn B, sew top sole and middle sew (running stitches)

Fit bottom sole and top sole together. Using Yarn B, attach two soles by sc st together.

Finished Product


Free Pattern: Ribbed Hexagonal Beret

😀 I’m in a good mood to give away the patterns i wrote before :) Guys, dig in! :)

Ribbed Hexagonal Beret

Ribbed Hexagonal Beret

Ribbed Hexagonal Beret

Ribbed Hexagonal Beret

Size: Fits average women’s head

Materials: Mint Green Acrylic Yarn [Fingering Weight] (4 Strands),  3.0mm Hook

Instructions:

Chain 4, slip st to form a ring.

Round 1: chain 1 (does not count as a stitch). Work 12 sc into ring. Join with a sl st in first ch.

Round 2: ch 3(counts as 1 dc) FPDc on same stitch. 2Dc on next st *dc on next st, FPDc on same st., 2 dc on

next st.* Repeat * 5 times. Join with a sl st in 3rd chain..

Round 3: chain 1 (does not count as stitch). Skip st, FPSc on next st, ch 2. FPDc on skipped st. 2dc on next 2

st, 2dc on next st, 2dc on next 2 st,*skip st, FPDc on next st, FPDc on skipped st,2dc on next 2 st, 2dc next st,

2dc on next 2 st*. Repeat * 5 times.Slip stitch on second chain of row.

Round 4: chain 1 (does not count as stitch). Skip st, FPSc on next st, ch 2. FPDc on skipped st. 3dc on next 3

st, 2dc on next st, 3dc on next 3 st,*skip st, FPDc on next st, FPDc on skipped st, 3dc on next 3 st, 2dc on next

st, 3dc on next 3 st*. Repeat * 5 times.Slip stitch on second chain of row.

Round 5: chain 1 (does not count as stitch). Skip st, FPSc on next st, ch 2. FPDc on skipped st. 4dc on next 4

st, 2dc on next st, 4dc on next 4 st,*skip st, FPDc on next st, FPDc on skipped st, 4dc on next 4 st, 2dc on next

st, 4dc on next 4 st*. Repeat * 5 times.Slip stitch on second chain of row.

Round6: chain 1 (does not count as stitch). Skip st, FPSc on next st, ch 2. FPDc on skipped st. 5dc on next 5 st,

2dc on next st, 5dc on next 5 st,*skip st, FPDc on next st, FPDc on skipped st, 5dc on next 5 st, 2dc on next st,

5dc on next 5 st*. Repeat * 5 times.Slip stitch on second chain of row.

Round 7: chain 1 (does not count as stitch). Skip st, FPSc on next st, ch 2. FPDc on skipped st. 6dc on next 6

st, 2dc on next st, 6dc on next 6 st,*skip st, FPDc on next st, FPDc on skipped st, 6dc on next 6 st, 2dc on next

st, 6dc on next 6 st*. Repeat * 5 times. Slip stitch on second chain of row

Round 8: chain 1 (does not count as stitch). Skip st, FPSc on next st, ch 2. FPDc on skipped st. 7dc on next 7

st, 2dc on next st, 7dc on next 7 st,*skip st, FPDc on next st, FPDc on skipped st, 7dc on next 7 st, 2dc on

next st, 7dc on next 7st*. Repeat * 5 times. Slip stitch on second chain of row

Round 9: chain 1 (does not count as stitch). Skip st, FPSc on next st, ch 2. FPDc on skipped st. 8dc on next 8

st, 2dc on next st, 8dc on next 8 st,*skip st, FPDc on next st, FPDc on skipped st, 8dc on next 8 st, 2dc on next

st, 8dc on next 8st*. Repeat * 5 times. Slip stitch on second chain of row

Round 10: chain 1 (does not count as stitch). Skip st, FPSc on next st, ch 2. FPDc on skipped st. 9dc on next 9

st, 3dc on next st, 9dc on next 9 st,*skip st, FPDc on next st, FPDc on skipped st, 9dc on next 9 st, 3dc l on

next st, 9dc on next 9st*. Repeat * 5 times. Slip stitch on second chain of row

Round 11: chain 1 (does not count as stitch). Skip st, FPSc on next st, ch 2. FPDc on skipped st. 10dc on next

10st, (2dc on next st) 2 times, 10dc on next 10 st,*skip st, FPDc on next st, FPDc on skipped st, 10dc on next

10 st, (2dc on next st) 2 times, 10dc on next 10 st,*. Repeat * 5 times. Slip stitch on second chain of row

Round 12: chain 1 (does not count as stitch). Skip st, FPSc on next st, ch 2. FPDc on skipped st. 11dc on next

11 st, (2dc on next st), dc on next st, (2dc on next st) 11 dc on next 11 st,*skip st, FPDc on next st, FPDc on

skipped st, 11dc on next 11 st, (2dc on next st), dc on next st, (2dc on next st), 11dc on next 11 st*. Repeat * 5

times. Slip stitch on second chain of row

Round 13: chain 1 (does not count as stitch). Skip st, FPSc on next st, ch 2. FPDc on skipped st. 30 dc on next

30 st, *skip st, FPDc on next st, FPDc on skipped st, 30dc on next 30 st, *. Repeat * 5 times. Slip stitch on

Round 14: chain 1 (does not count as stitch). Skip st, FPSc on next st, ch 2. FPDc on skipped st. 31 dc on next

31 st, *skip st, FPDc on next st, FPDc on skipped st, 31dc on next 31 st, *. Repeat * 5 times. Slip stitch on

second chain of row second chain of row

Round 15: chain 1 (does not count as stitch). Skip st, FPSc on next st, ch 2. FPDc on skipped st.15 dc on next

15 st, 2dc cluster on next 2st, 15dc on next 15 st *skip st, FPDc on next st, FPDc on skipped st, 315 dc on next

15 st, 2dc cluster on next 2st, 15dc on next 15 st *. Repeat * 5 times. Slip stitch on second chain of row

Round 16: chain 1 (does not count as stitch). Skip st, FPSc on next st, ch 2. FPDc on skipped st. 2dc cluster on

next 2st, 12 dc on next 12 st, (2dc cluster on next 2st) 2 times, 12 dc on next 12 st, 2dc cluster on next 2st,

*skip st, FPDc on next st, FPDc on skipped st, 2dc cluster on next 2st, 12 dc on next 12 st, (2dc cluster on next

2st) 2 times, 12 dc on next 12 st, 2dc cluster on next 2st, *. Repeat * 5 times. Slip stitch on second chain of row

Round 17: chain 1 (does not count as stitch). Skip st, FPSc on next st, ch 2. FPDc on skipped st. (2dc cluster on

next 2st)2 times, 9 dc on next 9 st, (2dc cluster on next 2st) , dc on next st, (2dc cluster on next 2st), 9dc on

next 9 st, (2dc cluster on next 2st)2 times, *skip st, FPDc on next st, FPDc on skipped st, (2dc cluster on next

2st)2 times, 9 dc on next 9 st, (2dc cluster on next 2st) , dc on next st, (2dc cluster on next 2st), 9dc on next 9

st, (2dc cluster on next 2st)2 times, *. Repeat * 5 times. Slip stitch on second chain of row

Round 18: chain 1 (does not count as stitch). Skip st, FPSc on next st, ch 2. FPDc on skipped st. skip st, (2dc

cluster on next 2st) , 7 dc on next 7 st, (2dc cluster on next 2st) 3 times 7 dc on next 7 st, (2dc cluster on next

2st), skip next st., *skip next st, FPDc on next st, FPDc on skipped st, skip st, (2dc cluster on next 2st) , 7 dc on

next 7 st, (2dc cluster on next 2st) 3 times 7 dc on next 7 st, (2dc cluster on next 2st), skip next st.,*. Repeat * 5

times. Slip stitch on second chain of row

Round 19: chain 1 (does not count as stitch). Skip st, FPSc on next st, ch 2. FPDc on skipped st. (2dc cluster

on next 2st) 2 times, 14 dc on next14 st, (2dc cluster on next 2st)2 times *skip next st, FPDc on next st, FPDc

on skipped st, skip st, (2dc cluster on next 2st) 2 times, 14 dc on next14 st, (2dc cluster on next 2st)2 times ,*.

Repeat * 5 times. Slip stitch on second chain of row

Round 20: chain 1 (does not count as stitch). Skip st, FPSc on next st, ch 2. FPDc on skipped st. 18FPDc on

next 18 st *skip next st, FPDc on next st, FPDc on skipped st, skip st, 18FPDc on next 18 st ,*. Repeat * 5 times.

Slip stitch on second chain of row

Round 21: chain 1 (does not count as stitch). Skip st, FPSc on next st, ch 2. FPDc on skipped st. 18BPDc on

next 18 st *skip next st, FPDc on next st, FPDc on skipped st, skip st, 18BPDc on next 18 st ,*. Repeat * 5 times.

Slip stitch on second chain of row

Round 22: chain 1 (does not count as stitch). Skip st, FPSc on next st, ch 2. FPDc on skipped st. 18FPDc on

next 18 st *skip next st, FPDc on next st, FPDc on skipped st, skip st, 18FPDc on next 18 st ,*. Repeat * 5 times.

Slip stitch on second chain of row

Round 23: ch 1(does not count as stitch) Half Double crochet on each st. Slip st on first ch.

Pattern Diagram:
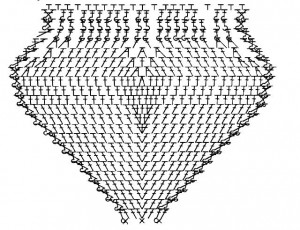
 

Ribbed Hexagonal Beret Pattern Diagram

Felting Wool – ahh the glory of it.

This was one of the reasons why i’ve been wanting to have wool yarns. I want to try felting and hehe. it was not easy  as i thought. The yarn did not felt the way i wanted it because my (lack of) patience took over.

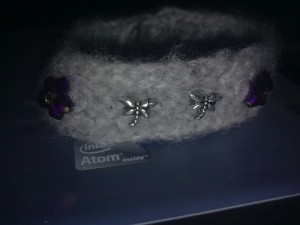
I cannot share yet the experience since i am more excited about the result. I will share next time the steps I had taken but i want to share this wrist wrap i was able to make:

Felted crochet bracelet

Felted crochet bracelet

Felted crochet bracelet

Felted crochet bracelet
Felted crochet bracelet Button


Things to do with a crocheted chain: Improvised Headband

Improvised Headband

Improvised Headband

Materials needed:

Variegated Pink Wool and Pink Cotton Yarn

Variegated Pink Wool and Pink Cotton Yarn

Materials for the headband

Materials for the headband

  • YARNS (of course!) – I used a variegated pink wool (bulky) and soft cotton
  • Plain black headband
  • A hook (4.5 mm)
  • Adhesive tape (Double sided) – Glue STick is much better, mind you.
  • some leaves to accentuate
  • button for the flower applique
  • needle

Using the variegated wool yarn crochet chain to cover the entire length of the head band.

Cover the headband with the crocheted chain. Put it in place using an adhesive tape. It is much better to glue it with a glue stick, but my glue gun’s at home back in the province so i have to improvise.

Create a 5 Flower applique using the solid pink cotton yarn.

– Chain 3 slip stitch to form a ring. *Chain 4, slip stitch into the ring * (Repeat 4 more times)

Attach a yellow button to the flower.

Attach five leaves at one side of the headband.

Attach the flower applique by sewing it into the headband.

:) Now you have an improvised headband. Pretty easy right?

Momoink loves it so much that she tries it on:

Momoink loves the headband

Momoink loves the headband

Free Pattern: Psychedelic Shell

[Hacking Ginantsilyo]

Project Description

It wasn’t an original design. In fact if you visit the stalls in mines view and wright park, you would see a lot of these in their shelves. What inspired me to make one too was it was when I obtained my first batch of baguio yarns and the lady who pointed me the place to buy them was making on these particular top. I bought one from one of the seller and tried to hack the stitches used for the blouse. :)


Finished Product

Pyschedelic Shell

Pyschedelic Shell

Pyschedelic shell worn by momoink

Pyschedelic shell worn by momoink

Continue reading