
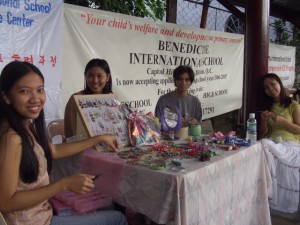
Tiny Treasures
Hobbies can turn into money-generating schemes.  U can earn while having fun. I used to design accessories using beads and yarns. Here are our first products:
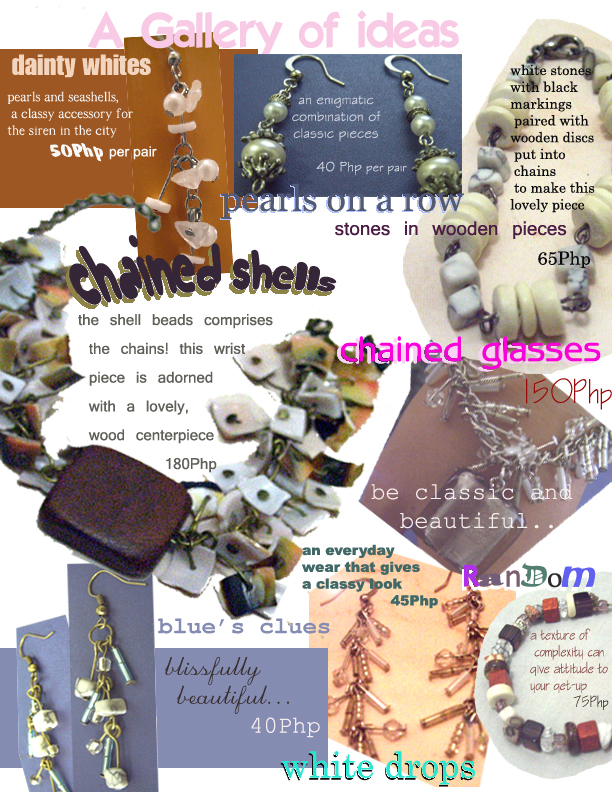
White and Everything Else
Tiny Treasures
Hobbies can turn into money-generating schemes. U can earn while having fun. I used to design accessories using beads and yarns. Here are our first products:
White and Everything Else
Most of the time, I love dressing her up

She is one of my beneficiaries of my crocheted anything.

And I think she always loves them:

I love crocheting.

And painting too.

Actually. I miss painting. But as you see, i am not so good at it :). I used to really want to be an artist.
For now, I am happy just being able to do what i love doing.

And being with the one i love most:


Little Red Riding Hood Bolero
This is a short-sleeved hooded bolero in deep red cotton yarn accented with mohair yarn around the borders of the hood.
Stitches are the same as what is used in the winter solace bolero.
Blinky is an imaginary characted created by 5-year old Jas.
His father Ryan Sandagon turned the imagination into an animation.
His father’s Org Buddy turned the imagination into a crochet project.
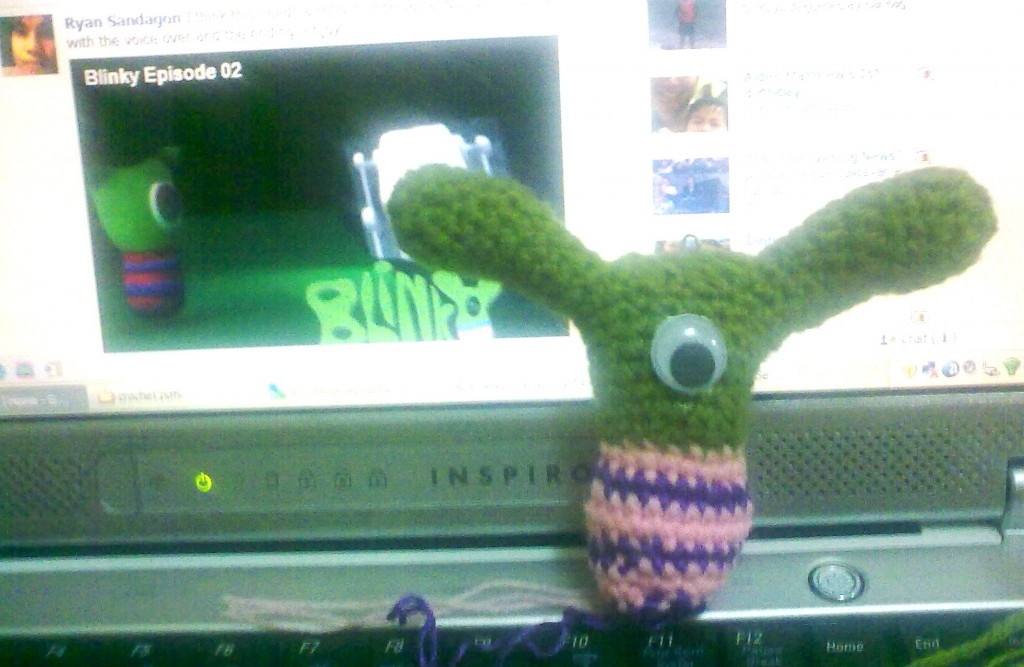
blinky
Here are the two episodes of Blinky’s World Narrated by Jas Sandagon
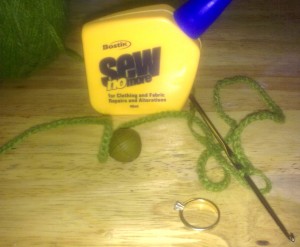
Materials for Voo Doo Doll (ring not included)
I’ve been squeezing my head for ideas on what you could do with crochet chains. Something easy and creative. And while I’m riding the MRT on my way home my mind drifted again. As it always does when i have nothing to do. I remember my favorite project – the witch doll which i learned during my elementary days. However the witch doll is a yarn craft not necesarilly something you crochet. Probably you could crochet the witch doll’s garment, but it’s not still the thing i have in my mind. As i discarded that idea, I remember my friend’s keychain a pink voodoo doll. Then it hit me.
You could actually create the voodoo doll’s head using crochet chains. You just have to wrap it around a ball, a wooden round bead or something. So here it is, the second series to the Things to do with a crocheted chain.
[Learn Ginantsilyo by Project]
What the project is about: crocheting rows of dc to form a band and make a bracelet out of it
One of the skills I learned as a crocheter is to incorporate crochet in jewelry/accessory making. I used to sell beaded accessories during college so I have a decent background on designing accessories. If you appreciate the beauty of threads against your skin and you look at the stitches as intricate designs for adornment, then let me walk you through with how you can turn simple rows of dc into a wrist band.
WristBand with button applique:

Violet Wrist Band with Buttons
Skills to learn:
About the yarn and button used :
The yarn i used is bought in Bodega sa Rosario, Pasig. It has the same texture and luster of embroidery threads commonly used in cross stitching.

Materials Used for making crocheted wrist band
I used the buttons with this kind of back. These buttons are given to me by a local store for tailoring needs. The owner got fond of me when i keep looking for unique stuffs in her store, so she gave me a lot of single piece buttons on her stock.

Buttons used
Materials:
I bought the metal links, bars, and wires at Quiapo. The metal bars costs around 20Php/pack (contains 10), the links and wires are around the same price.
All in all, the materials came cheap. It took me less than 30 minutes to create this accessory.
Instructions:

Make a knot on one of the bar findings/connector. This servers as your first sc on your row

Tighten the knot
Make a knot around one metal bar. And tighten it.This will serve as your first sc.
Make 8 sc around the chain like this:

First row of single crochet
Turn around. Chain 3 (serve as 1 dc). 8 DC into each next sc.

Second row of 9 dc
Create 9 rows with 9 DC.
Cut the yarn with a scissor, We will have to sew the yarn into the second metal bar with a needle.

Sewing the other end

The crocheted wrist band
Attach 3 metal links on each side of the metal bars. Then connect the 3rd links from both sides with the loop of the our wire.

Putting the links and improvised hook
Form the wire into a hook.

Improvised Hook
Attach three links in each side on the other metal bar. COnnect the 3rd links with another metal link. Connect the fourth link and the button using another metal link.

With Buttons Attached

Improvised Headband
Materials needed:

Variegated Pink Wool and Pink Cotton Yarn

Materials for the headband
Using the variegated wool yarn crochet chain to cover the entire length of the head band.
Cover the headband with the crocheted chain. Put it in place using an adhesive tape. It is much better to glue it with a glue stick, but my glue gun’s at home back in the province so i have to improvise.
Create a 5 Flower applique using the solid pink cotton yarn.
– Chain 3 slip stitch to form a ring. *Chain 4, slip stitch into the ring * (Repeat 4 more times)
Attach a yellow button to the flower.
Attach five leaves at one side of the headband.
Attach the flower applique by sewing it into the headband.
Now you have an improvised headband. Pretty easy right?
Momoink loves it so much that she tries it on:

Momoink loves the headband
[Hacking Ginantsilyo]
It wasn’t an original design. In fact if you visit the stalls in mines view and wright park, you would see a lot of these in their shelves. What inspired me to make one too was it was when I obtained my first batch of baguio yarns and the lady who pointed me the place to buy them was making on these particular top. I bought one from one of the seller and tried to hack the stitches used for the blouse.

Pyschedelic Shell

Pyschedelic shell worn by momoink
[Learn Ginantsilyo by project]
What the project is about: Creating a simple bolero (small shrug) using five pieces of crocheted fabric.
One of the skills I learned as a crocheter is creating ‘forms’ and shapes by adjusting the number of stitches and joining the pieces. This know-how is very useful for me, especially when creating wearable crochet. I can draw the pattern of a blouse and pick up a lace pattern I want then I can adjust the stitches to form the desired shape. I used this technique in creating the winter solace bolero.
[Background why winter solace? – the colors of the yarn used reminds me of the holiday season]
Winter Solace Bolero:

winter solace bolero
Skills to Learn:
About the yarns and the pattern:
1. Variegated Yarn of turquoise blue and yarn [You can substitue this with any yarns of choice]. I bought mine from the website http://craftandme.com. The owner gave this yarn as freebie from our last transaction. The yarn is labeled Indonesian Cotton Thread and is quite similar to the Monaco/Cannon mercerized cotton thread we have here in the Philippines, only that the yarn is twice thicker. If you are going to use these brands, two strands would be needed to match the gauge.

ICT Variegated Turquoise bought at http://craftandme.com
2. Turquoise blue Plush Yarn. I bought this yarn from Rosario, Pasig, the famous Bodega sa Rosario and such quoted as Rosario Yarns. You can substitute any plushy looking soft cuddly yarns I actually do not know the actual content of this yarn so i nicknamed it plush yarn

Soft Plush Yarn – Color Blue Green
3. A lace pattern – Pattern #45 from 252 Crochet Patterns Japanese Crochet Book. This has been my favorite lace pattern so far and I have created a lot of different projects from this.
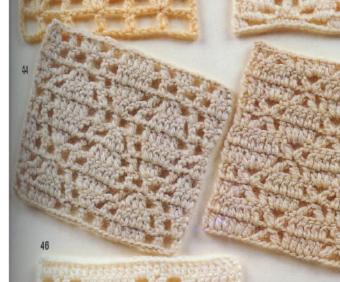
262 Crochet Patterns Excerpt
The bolero is made up of 5 parts, crocheted individually. 2 sleeves, 2 front parts and the back part. I sewed them together using left over crochet thread. Then I added the border. The border’s just plain dc. I used automatic locks to close the front part. And attached two medium sized white textured buttons in front to accentuate.
Gauge: I used 2.10 mm hook (US Size)
Materials:
—-
3dc cluster –
(Yo, insert hook in next st, yo draw yarn through st, yo, draw yarn through two loops on hook) 3 times. yo, draw yarns through 4 loops on hook.
2dc cluster-
(Yo, insert hook in next st, yo draw yarn through st, yo, draw yarn through two loops on hook) 2 times. yo, draw yarns through 3 loops on hook.
3dc closed shell –
Make 3dc on next st.
2dc closed shell –
Make 2dc on next st.
