Dressing up

I like making clothes and dressing up.

I dreamt of becoming a fashion model when I was young, but because of my very short stature, I shifted the dream to become a fashion designer or a fashion consultant. Amongst our circle, I usually give advice which clothes to wear or which accessories to use for an event. Sometimes, I even make them their own accessories on the fly. I really miss these times.

One of my favorite customer was a friend in college who loves dressing up too. She sometimes seeks my help to create the look she wants, but that was long ago.

My friend, Cris on a tribal inspired bling bling she asked me to make

My friend, Cris on a tribal inspired bling bling she asked me to make

I miss dressing people up, or helping them get dressed. Sometimes out of whim, we will parade on different clothes and make faces.

Then this year, I got lucky, nanay gave me a sewing machine to help me learn how to sew. I never really got the hang of it, but I’ll go there. It’s just not easy to insert sewing on my everyday tasks because sewing takes so much time and energy and concentration, and I am not an expert. But despite that, I was able to create three decent dresses, each differing on style:

The dress I was able to make :)

The dresses I was able to make :)

I am really fortunate for having an extended family like nanay and tatay, for always supporting me and believing in what I can do.

Now, I am targeting to finish a crocheted dress, and I think, I am getting there…

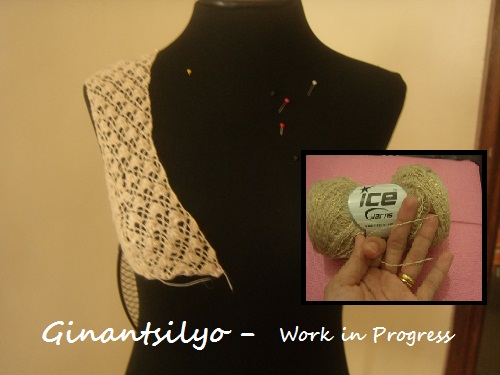
Dress - work in progress, finishing the halter top

Dress – work in progress, finishing the halter top

I am hooking up a crochet-as-you-go dress created from a lace weight yarn, I recently bought from a Turkey online store: http://yarn-paradise.com, during one of their promotions. The yarn is incredibly thin and light, perfect for a flowing halter dress I am imagining. Hopefully, I can create the dress I have been picturing in my mind.

Aja! Aja!

I love my mom

I love my mom.

She is not the doting kind. She would seldom praise you nor compliment your work. But she is the type that perserveres no matter how much difficult it is for her. Amidst all our financial troubles during the early years, though we had an almost incomplete family and literally negative savings, she stood up and brought us to what we are today.

She could have not, of course. She could have just let us be. And yet even with meager resources, I say that she was able to compensate everything with just pure hardwork and support. Though she may always disagree with me, I know she is just testing my will and disposition. We always do not agree on a lot of things, because of different point of views in life, but she stays beside me and I owe her a lot for that.

I could never tell in just pure words how thankful I am that she was able to bear it all and raise us like this. But I know she already knows.

I love my mom.

My mom - very patient with crocheting  a big blanket for my baby boy

My mom – very patient with crocheting a big blanket for my baby boy
[Yarns courtesy by my friends Liz, Danny and Mylein]

I dream of yarns as smooth as silk

I dream of yarns as smooth as silk
That through my fingers they would slip
I’ll make a dress as awe-inspiring
That everyone would be wearing

Lacy Crochet Dress in progress

Lacy Crochet Dress in progress

I dream of hearing my name as well
That it would mean wearable crochet
And they would ask, is it lorelie
The one who made your outfit today?

crochet enthusiast

crochet enthusiast

I dream of fibers i could spin
To threads of finest plying
And paint them by my hands and then
Label them with – by imeng

Yarn love

Yarn lover

I dream of becoming world famous
Crocheting the most marvelous
A library that offers one of my books
With patterns created from my own hooks

Sunday is Family Day

Sunday is family day for us.

Actually all weekends or every night after working hours if time and energy still permits, if not, my husband and I compensate during the weekends.

We are always busy during the weekdays, sometimes even through the night and a bit of Saturdays if we have pending problems to solve. So every Sundays, we go out and play with our baby.

Our baby loves to play and we take him everywhere.

Sunday is Family Day

Every weekend, we spend the day with our baby.

The village we currently live in has a number of playgrounds and a big swimming pool. He loves to be there, best. So, today as promised, we went swimming:

Sunday is Family Day

Sunday is Family Day

He really loves the water and he is not afraid to go down to the deep:

Brave Boy!

Brave Boy!

So our morning was well spent. We went home before lunch and our baby was really tired. This gave me sometime to sneak and grab my hook and continue my lacework…

Sunday Lacework

Sunday Lacework

Today is a tiring day again but well worth it. We also went out to buy our first Christmas Tree as a family.

Our very first christmas tree!!!!

Our very first christmas tree!!!!

I hope you also had a nice weekend :) Hook up!

A surprise for today.

I promised to write down the last part of the crocheted shorts instructions. Though I obliged, I never actually wished for a reward and yet I got one today and the reward came from Turkey!

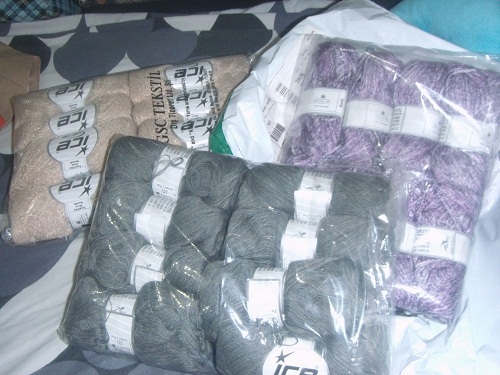
MY YARNS from ice yarns came today! :) HAPPY!

Last last week, my husband agreed of this purchase, though I originally planned to buy yarns from Indonesia, a fellow crocheter, introduced this yarn shop to our group in ravely. So I tried one day during their yarn sale last Tuesday, and ordered. Here they are:

ICE Yarns

ICE Yarns

Dainty little crocheted shorts

This project was for: My website :)

I have put down my blog for two years and I just recently put this up again. And I did try to make up by writing a post every now and then. And I am happy about the results. A few followers seemed to pick up and this prompted me to write down documentations of my crochet works. Though I still have to finish the article I wrote about the Nelia, crocheted blouse, I have finished one documentation about the crocheted shorts hack. Though I did not arrived at exactly the same output, I think, I did better :)

The project was made by: ME! I have spent sleepless nights for this.

The project:

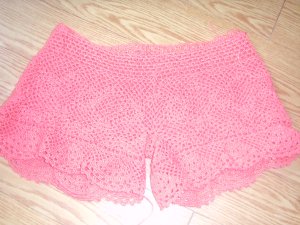
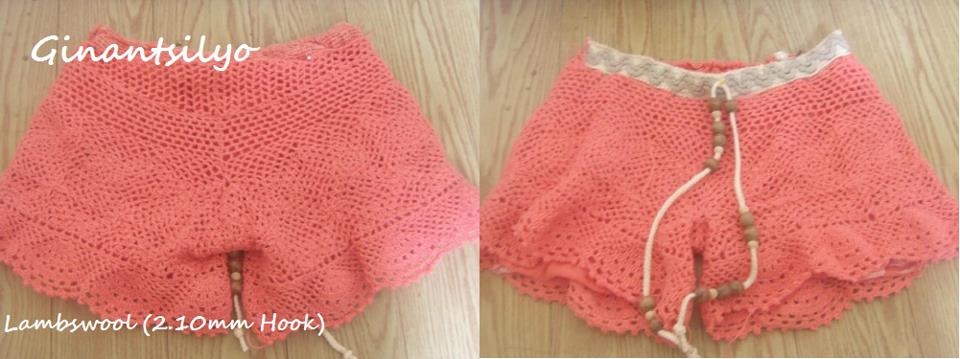
Taadaaaaaan!!! My very dainty little crocheted shorts:

Dainty little crocheted shorts

Dainty little crocheted shorts

To all those who picked up on my blogging (again)… Thank you guys. I do hope you understand my instructions because I am not a very good writer. If there are clarifications, you can post a comment below :)

I am very happy about the crocheted shorts and I am hooking on my next project. So see you guys again! :)

About the pattern:

You can follow my previous posts to recreate this shorts.


AngieHeart’s Shorts: Lace Edgings and Stitching Together

The final part of the series:

[Introduction, Basic Square, Connecting the Squares, Mesh & Half Motifs]

Now we are ready to crochet the last part of the shorts – The Lace Edging. The design uses a beautiful lace motif: a fan shaped lace with in between mesh.

You have to count your previous stitches here.The counting is as follows:
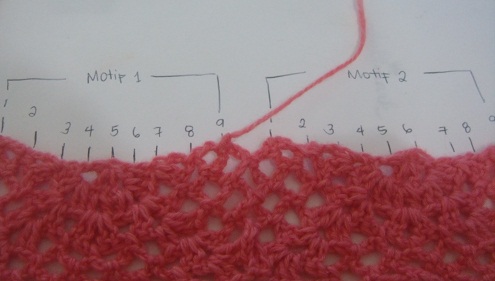
Foundation for the lace edging

Foundation for the lace edging

Each numbered stitch is where your dc 2ch will be stitched
Note that in my project, I have 7 half motifs stitched around.

Round 1: dc 2ch (or 3ch depending on the tightness of your stitches)make sure that the mesh around would not be too loose nor too tight.

Round 2: 3sc on each ch space, around (or 2sc depending on the tightness you want if round 1 is too loose, make it tighter by decreasing the number of sc in this row)

Round 3: 6ch (counts as 1 sc and 4 ch). (Note: sc on space between 3sc’s of previous row). Do sc 4ch around.

Round 4: Start on the middle of 4ch sp of previous row (slip st to the middle).  Do 2 ( sc 4ch ) You will reach the center of your half motif. * 5 dc into the next sp, sl st on next ch sp, counts as 1 sc.   Do 6 more sc-4ch repeats.* Repeat (*) around until you reach the two sc 4ch repeats you made on the start.

Round 5: Start on the middle of 4ch sp of previous row (slip st to the middle).   ( sc 4ch ) . * Do a dc – 2dc alternately on each five stitches of previous row.  sl st on next ch sp(count as one sc) 4ch .  Do 5 more  sc-4ch repeats. * Repeat (*) around until you reach the first sc-4ch you made on the start.

Round 6: sl st to the middle. **ch, *2dc on dc of previous row, ch skip one st* Repeat (*) four more times, sl st on next sp. (counts as 1 sc) 4 ch. Do 4 more sc-4ch repeats.*. Repeat (**) around until you reach the first st of your round. sl st on first ch.

Round 7: 3ch (counts as 1 dc) dc on each st (should have 14 dc) sl st on next sp. do the4  mesh until u reach the center again. dc on each st. repeat round

Round 8: ** 3ch (counts as 1dc) dc on same st. *2ch skip 2st. 2dc on next st* Repeat (*) 5 more times. 2ch sl st on next ch sp. Do 3 mesh. ** Repeat(**, note include additional 2ch at the start of **) around. then 2ch to close the round

Round 9. 3ch (counts as 1 dc) dc on next st . 2dc on ch space. repeat until you fill the center. (you should have 24 dc). sl st on next sp. *Do 2 mesh. 26 dc sl st on next ch sp* Repeat (*)around until you reach the last mesh of previous row. 2dc to close the round.

Round 10. sl st until you reach 3rd dc of previous round. 3ch (counts as 1dc) dc on next st. *2ch skip two stitches, dc on next two st.* Repeat (*) five more times. 2ch sc on next ch sp. ** Do 1 mesh.  ***2ch skip 2 st., dc on next two st***  Repeat (***) 6 more times, 2ch. ** Repeat (**) around. until you reach last mesh of previous row. ch 2 dc on next two st. ch 2. close the round.

Round 11. sl s until you reach the first ch of previous row. 3ch (counts as 1 dc) dc on ch space.* 2ch skip 2st, 2dc on next ch space.* Repeat (*) 5 more times sl st. ***(  **2ch sk 2st, 2dc on ch sp** Repeat ** 6 more   timess. sl st on next ch sp) *** Repeat *** around. :) then close the round and complete first motif by doing 2dc on ch sp, 2ch skip 2 st, 2dc on ch sp, 2ch.

Round 12 😀 FINALLY! LAST ROW! sl st on ch sp. Picot ( sc on ch sp 4ch sl st on sc, sc on ch space). sc on next two st, picot around 😀

YEI!!! DONE WITH THE LACE EDGING!

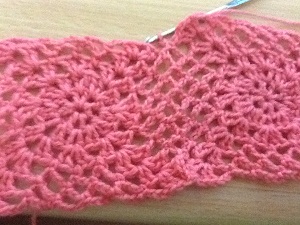
Lace edging

Lace edging

All you have to do next is to stitch the parts :) Be careful with stitching and do not ruin the lace design of the motif. To do this properly i pin the two parts in another pair of cropped pants I own:

See that there is still missing space for the shorts at the back.
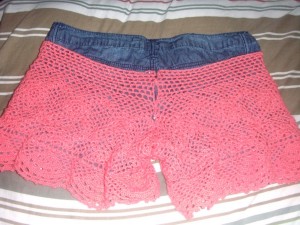
Back of shorts

Back of shorts

I have to fill this space by doing another mesh:

The lace mesh has 26 rows that is composed of dc 2ch (9 mesh in first row) up to 2 mesh on 26th row. The decreases depends on you :) I actually did not bother to count if the two lace mesh i made was exactly the same count :) Counting is sometimes stressful :)

Remember to make two of this!

Remember to make two of this!

Now, let’s sew the parts! :

Sew the back mesh we just made into each pair of back part of the short. The back part is the one with extra triangular half motif we made.

Then sew the back parts together!
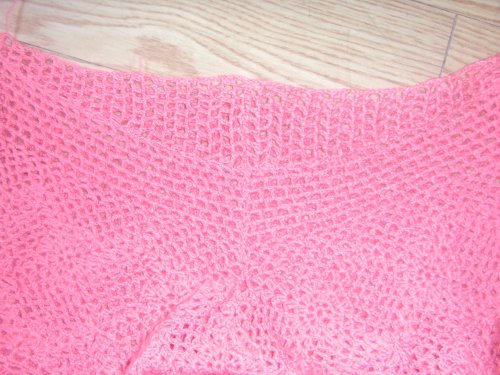
Back Part!

Back Part!

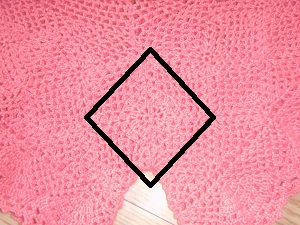
The half triangular motifs on each part will form a diamond shape when sewn :)

When you get this, it is your assurance that you are sewing the parts properly.

When you get this, it is your assurance that you are sewing the parts properly.

And sew around until you are done sewing the front :)

Front part

Front part

:)

You can choose to put a lining to your shorts and a space for garter :) I lined mine and sew drawstring for the waist. :)

Luckily for me I have an old top that i am no longer using so I am going to upcycle this by incorporating it to my crocheted shorts :)


Old clothes i want to use for my shorts

Old clothes i want to use for my shorts

Next! The finished shorts! 😀

If anyone succeeds on creating the whole thing from my hack please send me a link! :) I want to know if i have been helpful :)

AngieHeart’s Shorts: Lace Mesh and Half Motifs

I am following up on the instructions on making the AngieHeart’s Crocheted Lace Shorts. My last post was about crocheting motifs together.

The first layer of the motif is actually too short for me. So I added a layer of half-motifs.

The following is the instructions on making the half-motifs:

1. 4ch to form a ring. 4ch,  *dc ch * (repeat * twice),  Turn around

2. (Row 2) 3ch dc on first st, create open shell 1 on next ch space [Open Shell 1: 2dc ch 2dc], 2dc on next ch space, openshell1 on next ch space, 2dc on last st. Turn around

3. (Row 3) Do a half open shell 1 on first st, with 3ch as your first dc [Half Open Shell 1: 1dc ch 2dc], Open Shell 2 on next ch space [Open Shell 2: 2dc 2ch 2dc], Open shell 1 in between the 2dc of previous row, Open shell 2 on next ch space, Half open shell 1 on last st. Turn around

4. (Row 4) ch, sc on first st. 4ch sc, 3ch Open shell 2 on the corner, 3ch sc, 4ch sc, 4ch sc,  3ch, Open Shell 2 on the corner, 3ch sc, 4ch sc. Turn around

5. (Row 5) 5 ch sc, 4ch sc, 3 ch, Open shell 2 on the corner, 3ch sc, 4ch sc, 4ch sc, 4ch sc,  3ch, Open Shell 2 on the corner, 3ch sc, 4ch sc, 2ch dc on last st. Turn around.

Row 5: Angie Heart’s Crocheted Lace Shorts Half Motif (Before Stitching with the other motifs)

Row 5: Angie Heart’s Crocheted Lace Shorts Half Motif (Before Stitching with the other motifs)

On Row 6 you have to begin stitching the half motif as you go. Always sc alternately into your half motif and onto the other motifs.

6. (Row 6) ch, sc on same st. 4ch sc, 4ch sc, 3ch, OpenShell2 on the corner, 3ch sc, 4ch sc (three times) 3ch Open shell2 on the corner, 3ch sc, 4ch sc, 4ch sc. Yarn off

Row 6: Angie Heart’s Crocheted Lace Shorts Half Motif (After Stitching with the other motifs)

Row 6: Angie Heart’s Crocheted Lace Shorts Half Motif (After Stitching with the other motifs)

Then the next would be crocheting the upper part to form the waist of the shorts.

The mesh is composed of two parts:

  1. 4ch sc repeats on four rows
  2. 1dc 2ch (or 3ch, if you want a bigger waistline) repeats on remaining rows (the number is indefinite, depending on how long you want the upper part to be, I did 7 rows of this mesh)
AngieHeart's Crocheted Lace Shorts: Other Half Showing Two Layers of Lace Mesh

AngieHeart’s Crocheted Lace Shorts: Other Half Showing Two Layers of Lace Mesh

The length of your mesh depends on you. I decided on a shorter mesh, but on my first shorts, the mesh is wider.

First Crocheted Shorts showing a wider lace mesh

First Crocheted Shorts showing a wider lace mesh

——————————–

Two parts for the legs

Two parts for the legs

After finishing the parts of the shorts I am ready to crochet the lacy part around the legs (cuffs) but there is a problem with the design which I have noticed on the shorts I were able to make in the past. I added a modification to the design. The actual crocheted shorts doesn’t have a lining underneath to support the gap between the legs (That is pundyo in tagalog).

Space between the legs

Space between the legs

So, I added another half square motif to fill the gap.

Filling the gap

Filling the gap

Then there is another gap for the buttocks, since the behind is always fuller than the front, there would be a gap if uniform stitches were made for the front and the back.

Gap on the back

Gap on the back

My solution to this is to crochet another half motif (a triangular one) to fill the gap.

Filling the Gap II

Filling the Gap II

You have to follow the instructions for the basic square motif but just make sure you only have to crochet three corners instead of four. Then remember to stitch into the other motifs when you are already working on the 6th row.

Next is making the lace:

AngieHeart's Shorts: Lace Edging

AngieHeart’s Shorts: Lace Edging

See you on my next post!

Today, work is overwhelming

Today, work is overwhelming.

I have complained too much for the slow progress of our project. Complaining is too exhausting.  I do not want to put negative vibes to my team, early this week, but frustrations should be vent out and expectations should be cleared out, too. And before actually expressing all the frustrations, I have to filter out as much subjective insinuations there are and be able to clarify where the frustrations are actually coming from.  Good thing there are considerate colleagues to rely on, and are willing to listen, lest I could have exploded in one negative blast of emotions. As frustrated as I am to some people, I do still want to know where we could be more objective in achieving goals and meeting deadlines. I feel pressured already that I have work to do and problems keep sprouting here and there, as if a wild wind blew all the seeds in my direction, and around me is a land fertile for  nourishing troubles.

Crocheting keeps me calm. It soothes my nerves (though not those around my fingers) and composes my restless mind. So amidst all the anxiety that work brings me, I find serenity in creating laces and textures.

I am not complaining about the work load. Believe me or not, I find comfort that I have work to do and problems to solve. I complain about the drag of certain loads, where some milestones seem to be far from being reached. It’s like a forever work-in-progress (wip) which could turned into un(wanted) finished objects (ufo). In my world, wip’s should have constant progress. Ufo’s are not even considered. Hence, if there are any obstacles that hinder us from moving forward, I feel that it is my responsibility to shake the grounds and drag my team mates out of their comfort zones, literally drag them out and tell them directly

THIS IS NOT RIGHT. THIS IS NOT WHAT IS EXPECTED.

Without exclaiming overly attached statements like –

YOU PROMISED ME!

Happily, before the am shift ends, we were able to cheer a little bit by online solutions like www.shakeyspizza.ph where I could send pizza’s to my workmates around the country.

(Just as a background, I have people working with me in Luzon, Visayas and Mindanao.) [Minor exception to the sole person working in North Cotabato, where  electricity supply is not even reliable, Pizza parlors that offer online buying by a third person may seem out of the question. So, I just had to think of another better way to cheer him up)

Before the day ends, I am happy to tell that I have moved an inch up towards finishing this ridiculous synching method I have automated. Testing is dragging so a crochet hook is within arm’s reach. I am finishing the crocheted lace shorts as promised, to finally be able to provide a decent documentation on how I hacked AngieHeart’s crocheted lace shorts.

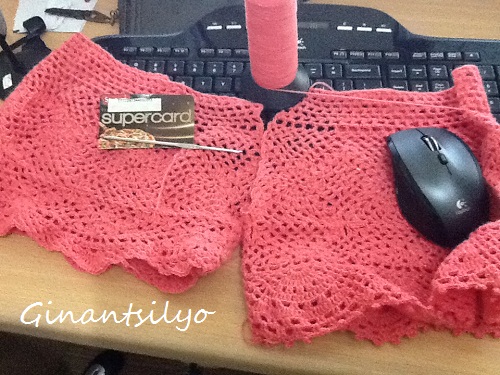
WIP - AngieHeart's Crocheted Lace Shorts

WIP – AngieHeart’s Crocheted Lace Shorts


Angie Heart’s Shorts – crocheting motif squares together

Following up my previous post about crocheting the Angie Heart’s crochet lace shorts, here are the instructions on how you would crochet the square motifs together:

1. You have to follow the instructions up to 5th round.

AngieHeart's Crochet Shorts Basic Square Motif Up to Round 5

AngieHeart’s Crochet Shorts Basic Square Motif Up to Round 5

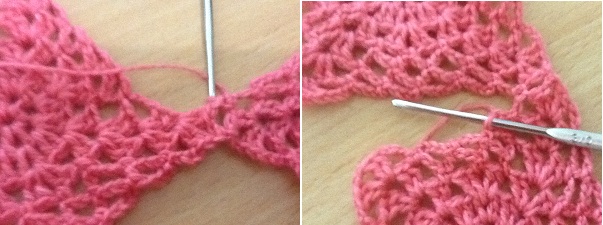
2. For the 6th round, crochet the first half of the open shell [ 3ch, dc 1ch, then sc into one of open shell’s of another square, sc into the ch space]

AngieHeart's Crochet Shorts Basic Square Motif - crocheting into another square 1

AngieHeart’s Crochet Shorts Basic Square Motif – crocheting into another square 1

Then continue doing the rest o f the open shell into the square.

AngieHeart's Crochet Shorts Basic Square Motif - crocheting into another square 2

AngieHeart’s Crochet Shorts Basic Square Motif – crocheting into another square 2

3. crochet 1 ch and sc into the next ch space of the other square then ch 1 and sc into the next ch space of your square

AngieHeart's Crochet Shorts Basic Square Motif - crocheting into another square 3

AngieHeart’s Crochet Shorts Basic Square Motif – crocheting into another square 3

4. Do the same thing on the next ch spaces. Do 2ch sc into the other square, 2ch and sc into the square for all ch sp with 4 ch. and 1 ch sc 1 ch to the ch sp with only 3ch.

Your two squares should be connected as if they were crocheted as one 😀

AngieHeart's Crochet Shorts Basic Square Motif - crocheting into another square 4

AngieHeart’s Crochet Shorts Basic Square Motif – crocheting into another square 4

5. Finish connecting two squares by connecting the corner open shells again: 2dc ch, sc on the other square, ch 2dc into square

Finish the rest of the 6th round:

AngieHeart's Crochet Shorts Basic Square Motif - crocheting into another square 5

AngieHeart’s Crochet Shorts Basic Square Motif – crocheting into another square 5


Connect 6 squares together. And make two connected rectangles :) so that’s 12 square motifs you have to make!

Next is crocheting the mesh :) on top of the motifs :D