AngieHeart’s Crocheted Lace Shorts – Basic Square Motif

Please read the introduction here.

[Hacking Ginantsilyo]

Looking closely, you can see that the basic design of the shorts is made up of a square motif. This is me, trying to hack the motif design:

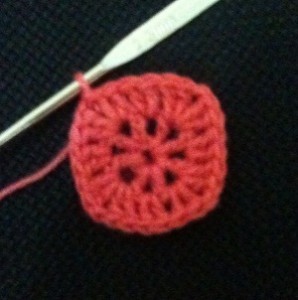
Foundation Ring: ch 4

Foundation Ring - AngieHeart's crocheted lace shorts

Foundation Ring – AngieHeart’s crocheted lace shorts

Round 1: 4ch * dc ch * repeat (*) around (should have 8 spaces)

Round 1 - AngieHeart's crocheted lace shorts

Round 1 – AngieHeart’s crocheted lace shorts

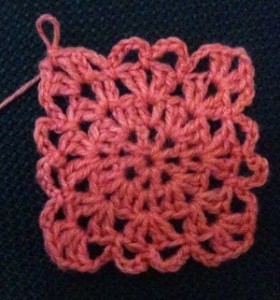
Round 2: (begin at the ch space)

OpenShell1 [2dc 2ch 2dc]

Begin at the ch space, 3ch dc 2ch 2dc on same st. *2dc on next ch space, do OpenShell1 on next ch space* Repeat 3x. 2dc on next ch sp. sl st to close the round


Round 2 - AngieHeart's crocheted lace shorts

Round 2 – AngieHeart’s crocheted lace shorts

Round 3: (begin at ch space)

OpenShell2 (2dc 1ch 2dc)

begin at ch space of the shell stitch. 3ch dc 2ch 2dc on same st. * Do OpenShell2 in between the 2dc of previous row. Do OpenShell1 on next ch space * Repeat (*) 3x. Do OpenShell2 in between the 2dc of previous row.sl st to close the round

Round 3 - AngieHeart's crocheted lace shorts

Round 3 – AngieHeart’s crocheted lace shorts

Round 4: (Begin at the ch space of the shell stitch)

3dc dc 2ch 2dc on ch space. *3ch sc in between two shell stitches of previous row. **4ch sc on next ch space** Repeat(**). 3ch, do openshell1 on next ch space* Repeat (*) 3x. *3ch sl st in between two shell stitches of previous row. **4ch sl st on next ch space** Repeat(**). 3ch. sl st to close the round

Round 4: Angie Heart's Crocheted lace shorts

Round 4: Angie Heart’s Crocheted lace shorts

Round 5: (begin at the ch space of the shell stitch)

3dc dc 2ch 2dc on ch space. *3ch sc  on next ch sp **4ch sc on next ch space** Repeat(**) 2x. 3ch, do openshell1 on next ch space* Repeat (*) 3x. *3ch sl st in between two shell stitches of previous row. **4ch sl st on next ch space** Repeat(**) 2x. 3ch. sl st to close the round

Round 5: Angie Heart's Crocheted Lace Shorts

Round 5: Angie Heart’s Crocheted Lace Shorts

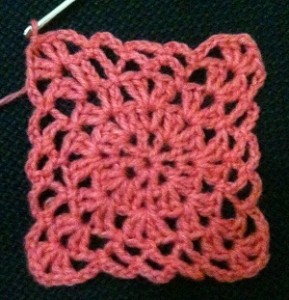
Round 6: (begin at the ch space of the shell stitch)

3dc dc 2ch 2dc on ch space. *3ch sc  on next ch sp  **4ch sc on next ch space** Repeat(**) 3x. 3ch, do openshell1 on next ch space* Repeat (*) 3x. *3ch sl st in between two shell stitches of previous row. **4ch sl st on next ch space** Repeat(**) 3x. 3ch. sl st to close the round

Round 6: Angie Heart's crocheted lace shorts

Round 6: Angie Heart’s crocheted lace shorts


You now have the basic square motif of the shorts! Congratulations!

Crocheting each square as you go is the next. See you again!

Crocheted Shorts

[Hacking Ginantsilyo]

Search Term(s): Crocheted Shorts

Link: http://www.google.com.ph/search?q=crocheted+shorts&hl=en&client=safari&tbo=d&source=lnms&tbm=isch&sa=X&ei=-kJoUNiTBKrBiQe024DgDw&ved=0CAkQ_AUoAQ&biw=1024&bih=672

 Chosen Entry: Lacy Shorts By [Angie Heart’s] Tokyo Fashion Co. blogged by All Things Beautiful

Crochet Lace Shorts by Angie Hearts

Crochet Lace Shorts by Angie Hearts

Reason for searching: I bought a tankini for my baby’s first birthday party (It’s a swimming party) But I just can’t go wearing just the tankini for two reasons: first, it’s a kid’s party and second my mom might just be too scandalized if I wear the tankini (just the tankini) all day throughout the party.

And so, since I am an avid crocheter indeed, I just had to crochet a pair of shorts for the party. I have found the right shorts, now I just have to figure out the stitches! hehe 😀

Here is the result:

Crocheted Shorts Challenge!

Crocheted Shorts Challenge!


And of course, an actual pic during the birthday party:

My Baby's swimming Party with me wearing the crocheted shorts

My Baby’s swimming Party with me wearing the crocheted shorts

Stay tuned for the pattern and instructions!

[Updated: Let’s get started with the basic square!]

Free Pattern: Nelia – Crocheted Blouse Pattern for the Back

Here’s the fourth part of the crochet series: Nelia. I am done with the pattern for the back and I am just so excited to share it!

[Learn Ginantsilyo by Project]

What the project is about: crocheting the back part of the Nelia – crocheted blouse by using the lace pattern discussed here and use increasing and decreasing stitches to form desired shape.

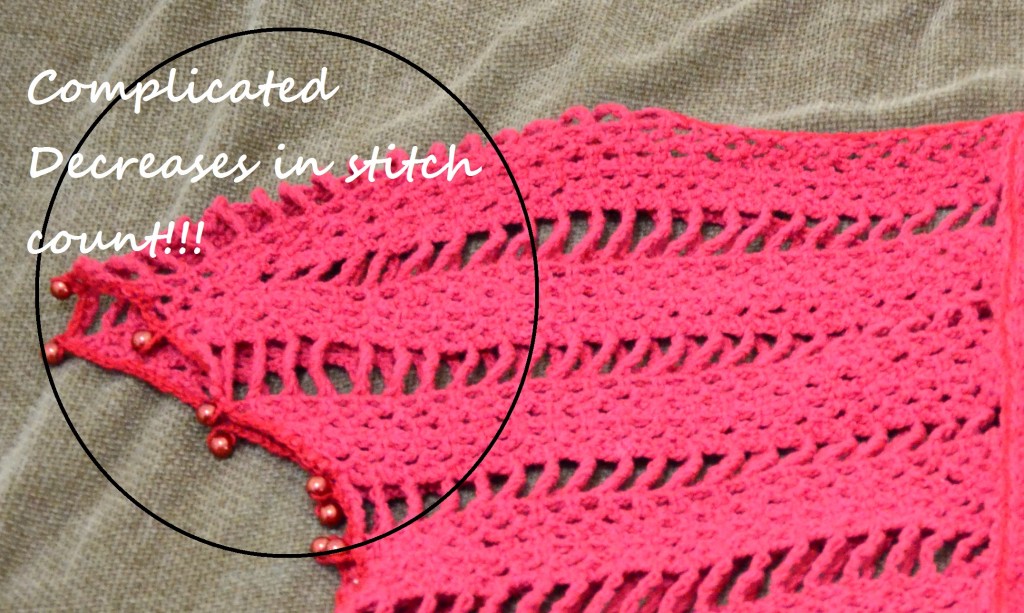
What is challenging for this part is maintaining the desired shape. I really enjoyed playing with the stitch count to form the back part. Here’s why:

Back part of Nelia - crocheted blouse showing a complicated decrease in stitch count

Back part of Nelia – crocheted blouse showing a complicated decrease in stitch count

See that part when i have to maintain that the front and back part spaces should match! and the ‘decrease’ to form the back part of the sleeve looks complicated! And it really was!

I had to always bring the crocheted garment on a piece of pattern I earlier prepared so as whenever I do each row, I have to make sure I acquire the desired shape.

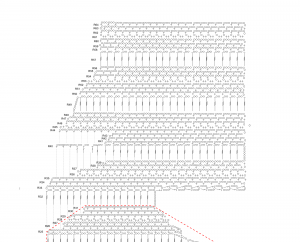
Here’s the pattern for the back. Dig in and enjoy!

Instructions:

[Important note! From your last row, do not cut off the yarn, work from last row (Row 31)]

Row 32: ch 10( counts as 1 tr tr, and 3 ch sp), do 10 tr tr and 2ch repeats on each st of previous row, the tricky part here is to crochet on the previous rows due to decreases. see the dashed line to know where you should put your hook.Continue doing tr tr 2ch until ur on 25th row. turn

Row 33: ch 4 (counts as 1sc and 3ch sp) do 16 sc 3ch until you reach the end of previous row. You will be working as if you are working sideways.the next 12 mesh repeat stitches will be done as if you are working in rows

  • first row (including last 3ch sp) ch 1, dc. turn
  • 2nd row 4ch dc turn (do 10 more rows)

Row 34. ch 1, do 27 sc 3ch repeats. sc. Turn

Row 35: ch 4 (counts as 1 sc 3ch sp), do 27 sc 3ch repeats. sc. turn;

Row 36: ch 2sc, repeat 22 times. sc. Turn

Row 37: ch, Do 23 sc 3ch repeats. sc. turn

Row 38: ch. Do 21 sc 3ch repeats. turn

Row 39: ch. Do 19 sc 3ch repeats. sc. Turn

Row 40: ch 10( counts as 1 tr tr, and 3 ch sp), Do 14 tr tr (triple treble) 2ch repeats. Do 2 dtr (double treble) 2ch repeats, do 3 tr (treble) 2 ch repeats, do 3 dc 2ch repeats, do sc 2ch repeats. On Row 40 you will work into the 35th row when u reach the end.

Row 41. You have to start your stitch on 8th standing st (second treble from the sleeves part)

4ch (counts as sc and 3ch sp). Do 18 sc 3ch repeats. sc. Turn.

Row 42: (to be continued)

Here is the pattern, you can download it by clicking the image below.

back part crochet pattern for nelia - crocheted blouse

back part crochet pattern for nelia – crocheted blouse


Cross stitching a wedding picture

I am not an avid fan of cross-stitching, but when I was thinking of ways to decorate our soon-to-be new house, I thought of putting a handmade touch to our wedding picture, and I thought of the following:

  • Painting– sure, I may not be a decent painter but I know I can draw, given the right initiative. And choosing between digital painting or hand painting was quite difficult during that time because:
    • I lost my wacom tablet’s pen.
      • I would not dare draw using a mouse!
    • Hand painting requires a lot of paints. Paints are messy and not really suitable if you have a little kid running around and poking at your stuffs.
  • Embroidery – pretty expensive and I have no decent experience from doing an actual project. But then again, paints are more expensive, right, plus it’s also been a while since I last hold a painting brush.

So I searched the net for picture to cross-stitch pattern and I found one decent site that offers free service! The website is pic2pat.com

So there starts my cross-stitching adventure. From acquiring the pattern to buying all the 75 skeins of DMC Thread, cloth and needles to actually doing embroidery work. And hence, I report my progress:

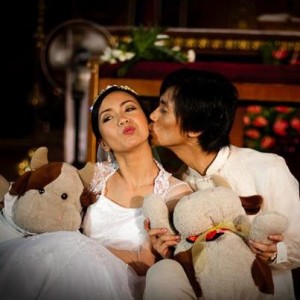
The generated pattern consists of 15 pages of separate parts and was derived from this wedding picture taken by our bestman:

Wedding Picture

Wedding Picture

I really, really liked this wedding picture. It shows the fun and doting side part of our relationship. hehehe. <3

 July 23, 2012

First part of the pattern - wedding photo cross stitch

First part of the pattern – showing the skirt of momoink

July 26

The Cross-stitch project showing the progress alongside the actual picture

The Cross-stitch project showing the progress alongside the actual picture

August 5

My wedding dress!

The cross-stitch prohect showing My wedding dress!

August 29

The hand of my husband holding Yaki can now be seen!

The hand of my husband holding Yaki can now be seen!

August 30

Small progress over a day :)

Small progress over a day :)

September 27

Who is that girl I see..

Who is that girl I see.. 😀 I am doing my face now..

September 30

 September 30 - Pouting lips

September 30 – Pouting lips

Free Pattern: Nelia – Crocheted Blouse Pattern for the Front

Finally, I was able to finish the pattern for the upper front part of the blouse.

[Learn Ginantsilyo by project]

Sketching the blouse

Rough Sketch of the blouse

What the project is about: crocheting the front part of the Nelia – crocheted blouse by using the lace pattern discussed here and use increasing and decreasing stitches to form a shape

One of the skills I learned as a crocheter is to create shapes by decreasing and increasing stitches. A simple mesh can take form by carefully adjusting the number of stitches per row. Following this notion, I decided on crocheting a top with a wide arm hole – forming the ‘sleeves’ as shownon the left. The sleeves here would be part of the main crocheted garment and would not be crocheted separately.


The UPPER – FRONT PART OF THE GARMENT:

Upper Front Part of Nelia-Crocheted Blouse

Upper Front Part of Nelia-Crocheted Blouse

The first part that I made was the upper front part of the blouse. You could see that there are increasing stitches on the left side of the cloth to form the sleeves and decreasing stitches on the right side of the cloth to form the neckline. The front parts are crocheted separately since we would join them using a ‘tie’ or a ribbon made from crocheted chain.

Crochet Instructions and Pattern:

We start by crocheting the foundation chain.

Foundation Chain : 55ch [start the next row by crocheting 1ch]

Rows 1-3: Start the Mesh described here.

Row 4: 2sc -ch repeats on the entire row

Rows 5-7: Same as Rows 1-3

Rows 1-7 will form the first part of the lace ‘stripes’.

Row 8: Make a wide stripe by doing a triple treble – 2ch repeats on the entire row. This open lace work will form the second stripe of the lace.

Do rows 9-15  in increasing stitches. Increase should be made by adding another sc – 3ch (same st) every time you reach the armhole part.

Row 16: same as Row 8 but add another tr tr – 2ch on the armhole part to increase stitch

Rows 17-23 will be same as rows 9-15 but start decreasing on the neckline on the 23rd row by turning to 24th row leaving two spaces [space == sc – 3ch] on the 22nd row.

Row 24 – Form the neckline by slowly increasing the stitch height and still following the pattern st – 2ch. The increasing of the stitch height would be (disregarding the 2ch)

[sc – hdc – dc – tr – d tr – t tr on the rest of the row]

Rows 25 – 31 would have decreasing on both sides (arm hole and neckline) The 31st row should have a total of 43 stitches or 10 spaces (sc – 3ch)

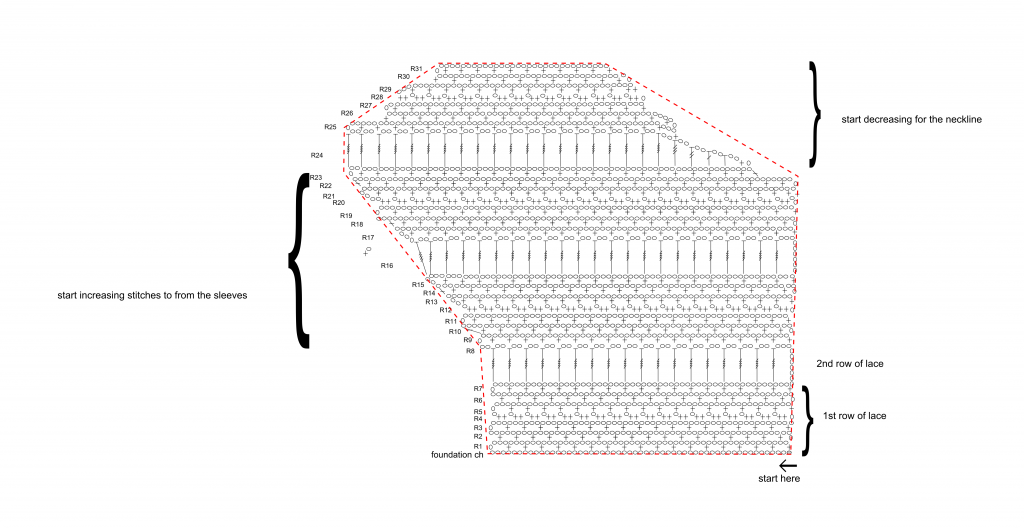
Crochet Pattern:

Front Pattern for Nelia - Crocheted Blouse

Front Pattern for Nelia – Crocheted Blouse

[You can download the pattern by clicking on the image]

The instructions and the pattern should guide you in making the upper front part of the blouse. Remember to make two of these but do not cut the yarn off until the next instructions for the back part. The back part and the front part will be crocheted as one, but the way the stitches were decreased for the back part is a bit more complicated.

See you for the next patten!

Nelia – Crocheted Blouse [the lace and the yarns] – II

[This is part II, for part I click here]

Pattern principle101 – Creating a lace

I am a fan of crocheted lace, whenever I sit down and decide to create a pattern I stick to basic crochet lace. Basic crochet lace consists of alternating counts of ch and sc forming a mesh. A variation of crocheted mesh is available on the web:

Different mesh made using alternating ch and sc or dc or treble [Image taken from http://ifecrochet.blogspot.com]

From my design I will use the pattern: 3ch sc repeats to create a very small mesh:

Simple crocheted mesh using  3ch , sc repeats

Simple crocheted mesh using 3ch , sc repeats

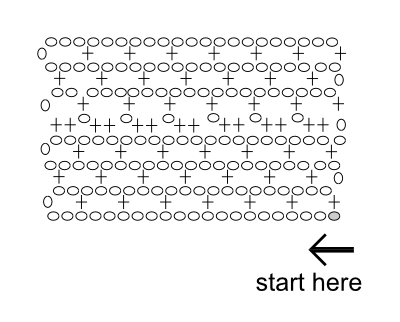
This will be repeated over a span of three rows then an entire row of 2sc,ch then another three rows of the 3ch sc repeats. The diagram below clearly illustrates the pattern for the mesh:

PATTERN DIAGRAM FOR CROCHETED MESH

PATTERN DIAGRAM FOR CROCHETED MESH

This mesh will make the first stripe of our lace.

The next stripe is quite easy to make since it consist only one row of stitches. This row is made by alternating 2ch and triple treble stitch. The triple treble stitch is equivalent to 7 ch, as opposed to the treble stitch which is equivalent to four.

To make the stitch, you have to add two more loops to the usual treble stitch

About the yarn used:

Approximately 2 balls of red 100g Soft Cotton Yarn were used. The yarns were bought from www.craftandme.com which is located in Indonesia. I ordered these yarns two years ago and have used these in a lot of crocheted projects already.

If you will visit their website, you can find a lot of colors for the soft cotton yarn:

Soft cotton yarn from www.craftandme.com

Soft cotton yarn from www.craftandme.com

My soft cotton yarn – color red:

My soft cotton yarn from www.craftandme.com

My soft cotton yarn from www.craftandme.com. The yarn has already been unraveled.

I think I ordered six or five balls of red, so that’s why I have so many of these. I have made a bag, a hooded bolero using this yarn too. Before the project, I have still three of these yarns each weighing 100g, since I used up another two for the blouse, only one ball is remaining on my stash. One precious ball! 😀

For the lining, I used a 90% lambswool with a brigther shade of red. I have huge lot of lambswool since I ordered the minimum amount of yarns I could two years ago. I was able to sell more than half of the stock, but I still have loads of cones left:

Lambswool/Sheep wool bought in China

Lambswool/Sheep wool bought in China. The red yarn is shown on the bottom right of the picture.

Please continue with Part III here


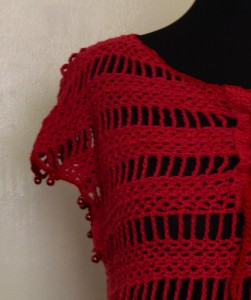
Nelia: Crocheted Blouse with front and back ties adorned with pearls

I was able to finish the crocheted top for my mother-in-law. Hence, I am very, very happy. To top the excitement brought by finishing a project, I get to take down a few notes on how I arrived on the design.

I remember the night when I was repeating rows and rows to be able to form the desired shape of the shoulder to armhole part of the top.

This prompted me to perhaps, write down the pattern for this blouse.

The project: Nelia – Crocheted Blouse with front and back ties adorned with pearls

Tadaan! the finished project: A very breezy crocheted blouse. Since she will be wearing this in Saudi, it is but right to make the lace wide and obvious.

Yup, you got it, my mother-in-law’s name is Nelia 😀

I first tried to make a floral pattern but the overall effect became like a curtain so i stopped doing that, and then I got this striped lace effect. I really like stripes 😀

Crocheted blouse for my mother-in-law

Crocheted blouse for my mother-in-law


Sneak preview of the pattern:

I am not able to finish the whole pattern today, because I have loads of other stuffs to do, too :) I also played with my baby today, and watched the UAAP 2012 Cheerdance Competition, [Hooray! UP WON!] but i was able to somehow draft the basic design of the lace. here it is:


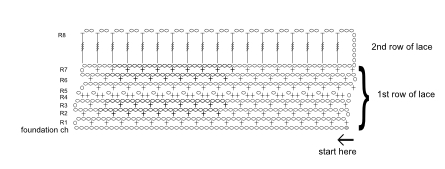
Lace Pattern for the crocheted blouse

Lace Pattern for the crocheted blouse

Note that the basic lace is just sc 3ch alternating on each row and then 2sc ch on the fourth then repeat the first three rows. The second layer of lace is a single row of triple treble 2ch repeats. :) The next part of the post would be about the adjustments on the pattern to form the shape of the shoulder and collar.

Hope to see you again!

Please read Part II here

Going to the beach, requirement: CROCHETED TOP!

The project was for: A crochet enthusiast always find a reason to crochet, and that was exactly what I was thinking when I made this crocheted top, october of last year, a week before our planned family get away for Boracay.

The project was made by: More often than not, I find myself as the recipient of my own creations. This is because, before I start with something, I must dedicate that something to someone, or else I would sway on my goal and probably not finish the project at all. Since we had plans for a family vacation, I thought then, I just had to do something for myself.

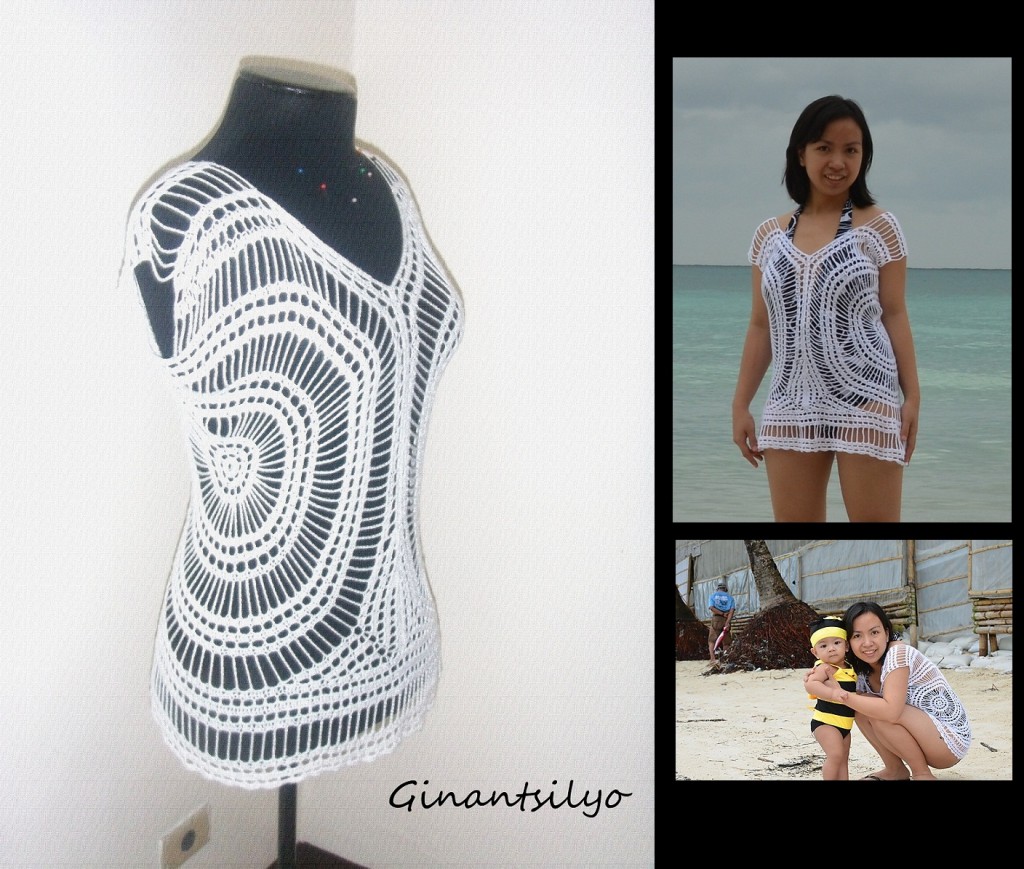
The crocheted top:

This is my favorite crocheted outfit so far.

Ginantsilyo - White Crocheted Top

Ginantsilyo – White Crocheted Top


About the pattern

start using a circular motif. Since i like dc’s and trebles, i sticked with that motif.

The outfit was inspired by another crocheted garment of a friend. Though I was not able to actually copy everything since I was only looking from a small picture of her in my wall, I got the idea of circular motifs out of her top :) Thank you for that!

Crocheted Earrings using mini crochet motifs-I

[Learn Ginantsilyo by Project]

What the project is about: crocheting small flowers using embroidery threads

One of the skills I learned as a crocheter is to interpret knitting instructions to crochet and read japanese crochet instruction books, since most of the stuffs i want to do are written as such. These skills are what I used to create these earrings:

Earring 1: Studded Crocheted Earrings – motif: sunflower
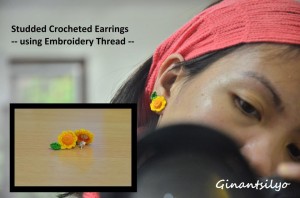
Studded Crocheted Earrings - motif: sunflower

Studded Crocheted Earrings – motif: sunflower
from 100 Mini Motif Crochet Patterns Japanese Crochet Craft Book

Earring 2: Dangling Crocheted Earrings – motif: arum lily
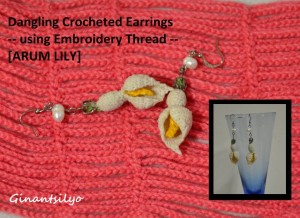
Dangling Crocheted Earrings - motif: Arum Lily

Dangling Crocheted Earrings – motif: Arum Lily
from 100 flowers to knit and crochet by Lesley Stanfield


Skills to learn:

  1. Read Japanese crochet instructions
  2. Interpret knitting instructions to crochet

Materials needed:

  1. Crochet Hook [0.8 – 0.9mm]
  2. Embroidery Threads [use two strands]
  3. White Glue
  4. Earring studs and hooks and other findings also jewelry tools like pliers
  5. Scissors
  6. Super Glue
  7. Reference books

I used two popular books for my reference: 100 Mini Motif Crochet Patterns Japanese Crochet Craft Book and 100 flowers to knit and crochet by Lesley Stanfield. These books are easily searched on google :)

I bought my studded earrings on an online seller at Multiply [link here] and I got some old earring hooks on my stash :)

PROJECT 1: Mini Motif Crochet Pattern 16

I love this book. It has loads of stuffs in it and I have been using this as reference for all my crocheted projects in embroidery threads. So now, i tried making one decent output from this.
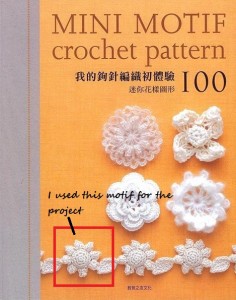
100 Mini Motif Crochet Patterns Japanese Crochet Craft Book - Cover

100 Mini Motif Crochet Patterns Japanese Crochet Craft Book – Cover

The pattern i used is on page 15 labeled Pattern 16
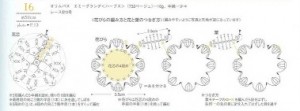
100 Mini Motif Crochet Patterns Japanese Crochet Craft Book - Sunflower Pattern # 16

100 Mini Motif Crochet Patterns Japanese Crochet Craft Book – Sunflower Pattern # 16
[Image from https://picasaweb.google.com/augusta2005/MiniMotifCrochetPattern#5309421990371768690]

This is how i interpreted the pattern:

I used three colors (orange, yellow and green) of the embroidery threads, the japanese instructions says that using the orange thread:

1. Create a loop and crochet 4 sc around to form a ring [4st] (round1), 2sc on each st [8st] (round 2), 2sc on each st [16st] (round 3), sc on each st for two rounds [16st] (round 4-5), sctog on 2 st [8 st] (round 6)

2. attach the yellow thread on the formed flower core, here you have to crochet a bubble of 3 dcs on each st from previous row and then   2ch sc 2ch on each space in between stitches. This will make 8 petals.

3. Attach the green yarn on top of any petals, ch 5, skip 1ch, sc, hdc, 2dc, hdc, sc on each side of the ch to form the leaf.

The instructions from above will make the flower. Create two.

Next put white glue on the back of the flowers using cotton buds. Avoid getting the glue on your fingers. Let the glue dry on the fabric. This would make the flowers stiff and maintain its form.

Attach the stud earrings using super glue, let it dry.

PROJECT 2: Arum Lily Dangling Earrings

Eversince I learned about this book, i just got frustrated because most of the flowers I want to do is in knitting instructions, and I do not know how to knit. Then after sometime I realized that the knitting instructions can be interpreted in crochet! And voila!
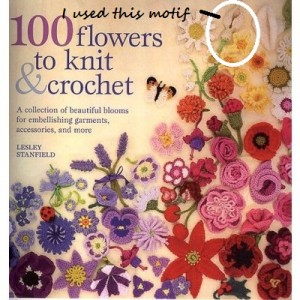
100 Flowers to knit and crochet by Lesley Stanfield

100 Flowers to knit and crochet by Lesley Stanfield

The pattern i used is on page 57 labeled Pattern 25, Arum Lily
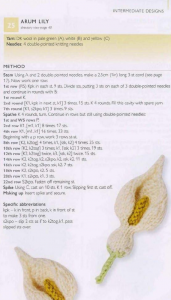
100 Flowers to knit and crochet - arum lily

100 Flowers to knit and crochet – arum lily

The knitting instructions are quite clear so i would just provide translation for crocheting.

  1. Drop the purl st [by drop i mean do not do all the rows that says P
  2. K is sc
  3. kpk (knit purl knit) asks you to make three stitches in one st, so do 3sc on a st
  4. s2kpo asks you decrease stitches so do 2sctog in one st
  5. m1, k1 also asks you to increase stitches, do 2sc on a st, and sc on next st
  6. k2tog is 2sctog

I followed the instructions from 1st round and disregarded the stem :) since i just crocheted round (4sc) for stem on desired length

For the Spike, i used 8 strands of embroidery thread and just do 6 ch.

I sew the spike on the flower, attached the flower in an earring hook and there! I also used white glue to make the flower stiff.

I can entertain more detailed how-to’s through comments :)


Ginantsilyo

Sa bawat paghigpit ng ilang hiblang sinulid,

Sa bawat buhol na pinagkakabit-kabit

Ni hindi maaninag and susunod na tahi

Kung hindi papakiramdaman ng mga daliri.


Sa ngalay na hatid ng pag-arok ko

Nang susunod na sundot ng aking pang-gantsilyo

Ni hindi ko batid ang matatapos na anyo

Sinusunod lamang, ang bugso ng pulso.


Mabining himulmol na siyang natatamo

Sa bawat galaw ng aguha’t kamay ko

At sa presilyang nakabuo ng hugis bulaklakin

Disenyo’ng ilang beses ko pang uulitin


Makirot ma’t mahapdi ang mga daliri

Batid kong paghinto’y hindi magiging madali.

Sapagka’t ang puso’y sabik na ‘di mawari

Sa blusang ginantsilyo nang buong pagtangi.

[September 16, 2012]


*Aguha – crochet hook

** Presilya – loop

——— Disclaimer: the following is a lousy attempt to translate the whole verse in english —-


Every tightened strands of thread

And every knot that i try to connect

I can merely perceive the next stitch

If not by the touch of my own fingertips


To the numbness and pain that it took

Of every next prick of my crochet hook

I’m not even sure of what the project will be

I just follow the pulse and the guts within me.


The lushness of the fabric that i can create

On every move of my hands that crochet

And every loop that forms a floral design

A pattern I would repeat a few more times


My wrist and fingers may sore and all

I would still not be able to stop and stall

Because I, myself, am a little bit excited

On the blouse I crocheted with love and jest.