Ginantsilyo – a brand in the making

I have long wanted to create my own brand. A brand that offers unique and elegant designs as well as delicate and high-quality craftmanship.

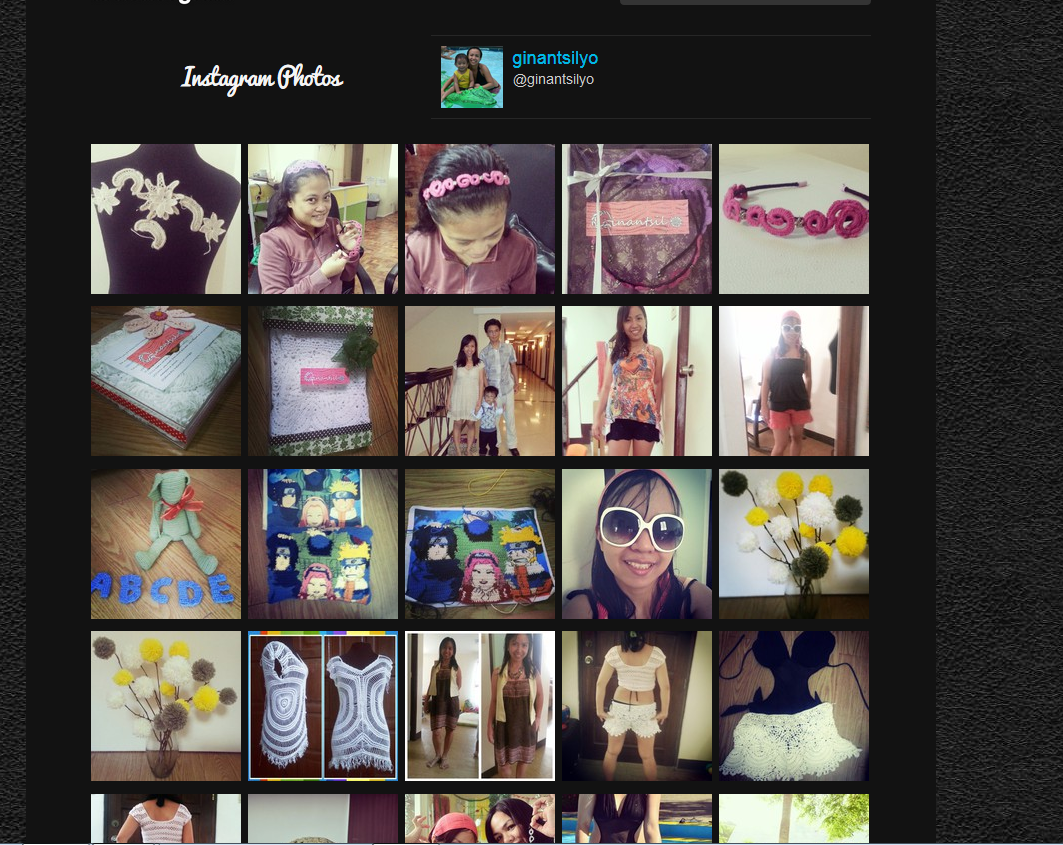
Before I opened my facebook page at http://facebook.com/ginantsilyo, my plan was to start with a line of bags I personally designed but the plan was sidetracked with so many things that pushed me to just have the site up.

Now that my first bag has found a client, I am very keen to reawaken my dream. I started searching for customized labels but deemed them too much for my need then I rediscovered my clay-molding skills.

The first reverse-mold was a bit ragged. It’s not easy molding the letters, the clay breaks when folded and does not really follow the form i want it to do. But I gave it a try and created my first mold and cast as well

I liked how the label in my bag looks. The endeavor looks promising enough that I took the courage to create another much better push mold, creating the first one gave me enough experience on how the letters should fold and curve. This is my second push mold:

Now this looked smoother and more polished. No more jagged sides and broken fonts. :) I cured another mold for it and created my first cast:

This looks more promising than the first one. So I baked my first cast. My only worry is that since the whole thing seemed like it was glued on a base layer. I noticed that most of my bags has an “engraved” label. That would mean I have to make a stamp instead of a mold. But creating a reversed “image” of my logo seemed not easy, until I gave in and tried to make one:

And yes! I loved the way I was able to render this last image. Because the spacing of the fonts are right and I was able to bend and mold the letters without showing the breaks in between.

I had to mix in colors because I do not have the right shade that is needed. I mixed in gold powder so that the clay would have shimmer.. I tried my first stamp :) Eeek!!! I can repeat the designs!!!

And finally! My final output! :) I had to put the holes so I can sew the label into the bag.

I took my unfinished bag out and placed the label to see the effect :) I loved it :) I think all the effort I put through was worth it. Triple worth it :)

Heartwarming post

It warms my heart every time my friends love my work.

A friend tagged me in her photos and I was really taken by the striking scenery of waves and sand that I fail to find a reason why I was tagged.

Then I realized that she was wearing the crocheted shorts she ordered me a few months back :)

This actually made my day :) Hence I got inspired to create a new tagline for my facebook page.

Thank you Maya. :)

Here is my new tagline for my site:

Ginantsilyo: where being fabulous starts with a stitch

Ginantsilyo: where being fabulous starts with a stitch


A gift of ginantsilyo

A few weeks ago, a friend of mine, Gina, presented me her latest project. A crocheted woolen skirt of deep purple and black. She had intend to sell the skirt and asked me for marketing help. But when I saw the skirt, I immediately wanted it. Not for me, but for my sister, who has been asking me for something crocheted.

Ginantsilyo ni Gina

The skirt has relatively simple stitches but the execution was clean and pretty. I am not really good at making decent even stitches but I always try and I know that it is very difficult to do. I have to make repeats of rows just to maintain the evenness and this is what she was able to procure.

Read more about the dress at her blog entry, here.

To make the story short, I purchased the skirt from her after some negotiations about the size and the (ahem) price. I received the skirt a week after in a wonderful packaging:

Beautiful packaging

Beautiful packaging


The gift finally reached my sister who was very happy receiving and even wowed at the box, which I added some crocheted flowers on top as accent:

My sister finally receiving her gift of ginantsilyo

My sister finally receiving her gift of ginantsilyo

And the best thing about this is I was able to market the skirt to another client. :) Gina will be busy crocheting in the coming months :)

Fancy giving your love ones, a gift of ginantsilyo?

Introducing Gina’s first Ginantsilyo. Available for sale. Fitted Skirt – Acrylic – wool blend
Php 1,200 for size small – medium [waist 24- 27].

Add Php 200 for every size increase
(Large: Php 1,400 waist is 27-32)
(XLarge: Php 1,600 waist is 32-36)
(XXLarge: Php 1,800 waist is 36-40)

Crocheted Swirls Headband

You know when inspiration suddenly kicks in and you just have to get up and quench that lingering thirst to create? It happened to me, a few nights ago. When I came up of a better way to create the swirls I have been wanting to create using padding cord and sc. I pulled out a thick and soft yarn from my stash and crocheted. This the only way I can sleep, when I have proven that what my mind is thinking would be right.

Here is the finished hair accessory, the metal floral accent complements well with the soft pink thread.

Hot Pink crocheted Swirls with metal floral accent

Hot Pink crocheted Swirls with metal floral accent

And here is the concept behind the stitch. I have observed this when doing Irish Crochet motifs. When you crochet over padding cord and you have to push the thread tightly together to establish a round curve on the next layer. So with this I was able to create a twisting swirl by crocheting multiple sc’s over the padding cord, pushing the stitches tightly together so that it will coil by itself, crochet more until the coil would form tightly enough it can stand on its own. Do this on both ends of a short padding cord and stitch the two ends together by tying a knot.

Ginantsilyo - Hair Accessories

Ginantsilyo – Hair Accessories

The attempt was successful enough to create my next design of hair accessory. This took just half a day to finish and I sew it on the headband (wounded with woolen black yarn) so that it would be affixed permanently and then I applied white glue on the back, just enough to provide a subtle stiffness to the swirls.

The hair accessory was very simple yet there is something to the swirls that wants me to not let go of the project. But an order is an order, so I must comply. I did not feel any regret now, as the client was very happy with what I was able to deliver.

Happy Client with Ginantsilyo Hair Accessories

Happy Client with Ginantsilyo Hair Accessories

Thank you jen, for buying Ginantsilyo. I am not really sure if you like everything I created because they are too preppy and feminine :) But I am so glad that you did!
 

Designing a pregnancy dress

Howdy. It’s been a long time since I last wrote a blog.

Right now, I got inspired to design the pregnant me, a new dress that I hope I can finish this year. The dress will be crocheted using a linen thread I recently bought from China. The thread has a silver hint on it and very soft, that is why I picked it up for my project.

Linen Yarn

Linen Yarn

I very much hope I can create this dress the way I have imagined it to be. This is the design I sketched:

Lacy Pregnancy Dress

Lacy Pregnancy Dress

The design is very lacy and feminine. I like frills and flowers and ribbons and lace.

I have already picked up the design for the lace. It’s a beautiful lace I have long admired from the works of a fellow crocheter at http://crochetology.net, if i am not mistaken. The lace is from a Duplet magazine I am studying for my other project. So goodluck to me! 😀

Open Lace Work

Open Lace Work

Three years and Counting – a Naruto Themed Anniversary Gift

Last week, I suddenly felt the overwhelming need to create my husband a gift for our anniversary this week. I have always made gifts for Mike since we started going out as couple and I stopped when we got married. Mike doesn’t want anything but service like a massage, a different food experiment, a coffee concoction, even a haircut. So I indulge him by providing him massage and cooking food for him. But then I realized that these things have been an ordinary token of love that I just have to make something not ordinary.

Since my husband is a very simple guy, it is harder to think of something that would really make him like, you see, he is very content and happy but I just want to see that hint of surprise in his eyes.

Mike always love Naruto. He is the one who even introduced the anime to me. So we used to spend days watching the series repeatedly.

And it is from that concept that I felt I have to do something inspired. But remember that I have already given him a Naruto crocheted coaster a while back? Doing something like that would not have anything “special” to it, so I have to think more.

Then I thought of the whole characters in Kakashi sensei’s team. It was a feat, of course as I only have five days to make the gift and I cannot crochet when he is around and I have work.

But I was able to finish the gift! And seeing him very happy with it filled my heart with delight :) I cannot remember now the day I woke up in the morning to crochet endlessly 😀

Here are the pictures:

Naruto Team 7 - Kakashi Sensei, Naruto, Sakura and Sasuke - themed crocheted pillow

Naruto Team 7 – Kakashi Sensei, Naruto, Sakura and Sasuke – themed crocheted pillow

Naruto Team 7 - Kakashi Sensei, Naruto, Sakura and Sasuke - themed crocheted pillow

Naruto Team 7 – Kakashi Sensei, Naruto, Sakura and Sasuke – themed crocheted pillow

Naruto Team 7 - Kakashi Sensei, Naruto, Sakura and Sasuke - themed pillow

Naruto Team 7 – Kakashi Sensei, Naruto, Sakura and Sasuke – themed crocheted pillow

Mike holding the pillow with glee

Mike holding the pillow with glee

We celebrated our third year anniversary yesterday! Three years with a new baby in tow 😀

Happy Anniversary!

Happy Anniversary!

Crocheted Shorts – All Lacy and White

Today, I have finished crocheting the made-to-order shorts by one of my friends who is currently working in Laos. She wants a crocheted shorts she can use as an alternative swimwear coverup.

At first I was reluctant to recreate my first crocheted shorts, as it was not an original design.

Crocheted Shorts

Crocheted Shorts

But my friend’s requirement was just it has to be white like that.

I finally am able to create my own design of a crocheted shorts after going over my previous crocheted shorts (I had already three, none were original designs). Here I present how the concept of the shorts is actually made out.

First, you have to think of three different patterns:

[1] The Upper Mesh that usually consists of just dc – ch repeats

[2] The middle part which will composed of motifs

[3] The lace edging that will form the partition between the legs

On my first attempt to design a pair of shorts, I picked up a snowflake design motif (hexagonal)

This is my first use of a hexagonal motif, hence I am not really sure where should I join the edges:

Snowflake motif

Snowflake motif

My first attempt is to join the motifs on three points, I later found out that it’s better if i connect them on five points so that the holes are smaller and minimal. Also the stretching factor would be lesser.

The trick to actually be able to gauge the size is to get one of your shorts and laid the motifs flat. So you would know how much the sewn motifs will have to accommodate stretch and where you have to add the edges.

Snowflake motif

Snowflake motif

Next is to crochet a dc-ch mesh on top of the motifs to secure them together and maintain the shape. Take note that the mesh should have more rows on the back than the front, to accommodate the fullness of the buttocks.

The fun part here is i added a strip of “flower” open-lace-work to giveway to the very plain dc-ch mesh.

Summer Crocheted Shorts

Summer Crocheted Shorts

And now I have chosen an open-work-pattern for the lace edging that looks as if the points of the snowflakes bends and meet and make little droppings of icicles down the edges.

What do you think?

Summer Crocheted Shorts - Funky and Sexy

Summer Crocheted Shorts – Funky and Sexy

The shorts is available in Made-to-Order Basis starting at Php1,200 for size small. If you are of different size, add Php200 per size increase. So if you are size medium, the shorts will cost Php1,400. I used a laceweight cotton yarn and size 1/0 hook :)


Yarns for Moira

This is long overdue. Every time I think of the yarns I will give to Moira, I cannot help but be poetic. Her name conveys allusion to something blissful yet strong and firm, or so I just feel that way. So I looked up the meaning of “Moira”
and found that it means:

From the classical world, the name Moira stems from the Greek word for fate, also meaning ‘doom’, ‘destiny’ and ‘lot’. In Scotland, Ireland and England, the name Moira is said to mean ‘bitter’.

source: http://wiki.name.com/en/Moira

The name alone conveys two definition almost unrelated to each other :P.

Anyway.. I want to show the yarns I was able to wind by hand, as she requested for “a little bit of everything”:

Yarns for Moira

Yarns for Moira

and here is the poem I am able to write because the phrase “Yarns for Moira” keeps singing in my head

Yarns for Moira

Happiness is best enjoyed when shared.
‘Tis a bundle of joy in each ball of thread.
Wound as dense as a tightly clasped fist.
Gift to a friend who crochets using plastic

A try on Irish Lace, Bruge’s Lace and Filet Crochet

Last week, I was fortunate enough to have all the time in the world to just crochet to my heart’s content. I want to share what I have come up with.

First is a Bruge’s lace concept idea that have been running on the back of my mind for a long time now. I had the chance to jot it down, and I want to share this with you.

Bruge’s lace is easy to start but is rather complicated to work around. I have tried to work on a bruge’s lace project before that did not succeed because I forced to finish this during a travel wherein I wasn’t able to gauge the right size. Hence, big fail.

Bruge’s lace has many facets, such as any other crochet tecnhiques, but I am able to try the basic one, that which forms a continuous vertical strip you turn to form a round corner to adjust the width of the lace:

Attempt on Bruge's Lace

Attempt on Bruge’s Lace

This pink project should have been a pair of shorts. :) I failed to make the right size for the crotch area and I have to unravel the whole lace strip to correct it so i decided to just let it be.

But this kind of lace amidst its simplicity is so alluring against the skin that I know I have to do something like this again. And yes, since then, I have been conjuring a basic design I could probably make in the future. And here it is:

Bruge's Lace Conceptual Design with Hexagonal motifs

Bruge’s Lace Conceptual Design with Hexagonal motifs

The Bruge’s lace part here is already in the works but I haven’t gotten the time to actually photograph.

Now the other obsession is my liking for irish crochet. I have been trying to create something using this technique but if the project is too small to satisfy my obsession, I haven’t created anything that is really successful. My first project on irish crochet resulted in creating Big and Fat Silver Earrings, and the Lacy Headband. This time, while trying to create another lacy headband, I realized I could take the time to create an Irish inspired blouse. :)

Passion Flower Design from Priscilla Crochet Collection. Lifted from the book,

Passion Flower Design from Priscilla Crochet Collection. Lifted from the book, “Irish Crochet and How to Make it”

I started with my most favorite design of Irish Crochet, the Passion Flower. I love the complexity of the stitches and the simplicity of the actual output. It looks dainty and one can be immediately curious about the cylinders of rolled over threads in the center of the flower. With this motif, I learned how to make the roll over stitch.

Working on irish crochet

Working on irish crochet

Initially, I thought I can crochet in between stitches and mend using a hook rather than a needle. This proved to be very difficult and time consuming so I took the bother to find for a tapestry needle. It was a wise decision. :)

Motif Construction

Motif Construction

As this was my first successful attempt in pursuing this kind of crochet construction, I was quite proud that two days passed without me, giving up. :) I knew I just have to finish the irish lace front and do some filet mesh on the back.

Irish Lace Front - Filet Crochet Back

Irish Lace Front – Filet Crochet Back

Currently, everything is still a work in progress. Work suddenly has to catch up and I have to rest my projects for the meantime. But I am eager to come back to these every possible time. I hope I can show you the finished blouses soon!!